TL;DR:
- Mastering errors like clipping, over-compression, and format issues are highly preventable but can severely damage a release.
- Using proper metering, following checklists, and conducting thorough tests ensure high-quality, compliant masters across formats.
- Building structured review processes and understanding gear help engineers catch errors early and improve mastering skills.
A single mastering error can get your track rejected by a digital distributor, ruin a vinyl pressing, or make your release sound unprofessional next to competing artists on any playlist. We've seen it happen at every level, from debut independent releases to label-backed projects with serious budgets. The frustrating part is that most of these errors are entirely preventable. This article breaks down the most common mastering mistakes, gives you real-world examples of how they damage releases, and walks you through exactly how to avoid them, whether you're preparing music for streaming, CD, or vinyl.
Table of Contents
- Understanding common mastering errors
- Digital clipping and distortion: Causes and fixes
- Loudness errors: Over-compression, LUFS targets, and post-normalization
- Format conversion pitfalls: Artifacts, phase, and distribution failures
- Hard-learned lessons: What mastering errors teach us
- Take your mastering to the pro level
- Frequently asked questions
Key Takeaways
| Point | Details |
|---|---|
| Clipping ruins releases | Digital clipping and distortion can cause music to be rejected by streaming services and labels. |
| Match genre loudness | Aim for recommended LUFS targets by genre to avoid weak or overly aggressive sound. |
| Check conversions | Always audit your master across formats to prevent artifacts and phase issues. |
| Human ears matter | Blind tests prove human mastering identifies and avoids errors better than AI tools. |
Understanding common mastering errors
Before you can fix a problem, you need to know what you're looking for. Mastering errors are technical or creative missteps that occur during the final stage of audio production, the phase where your mixed tracks are polished, balanced, and prepared for distribution. These errors affect sonic quality, platform compliance, and listener experience across all formats.
Here are the most common mastering errors you'll encounter, each with a real example of the damage they can cause:
- Digital clipping: This happens when audio peaks exceed 0 dBFS (decibels full scale), producing harsh, crackling distortion. Example: A track submitted to DistroKid gets flagged and rejected because the limiter was bypassed during export.
- Over-compression: Applying too much compression kills dynamic range, making the track sound flat and fatiguing. Example: A rock album mastered at a dense, over-compressed level sounds lifeless compared to reference tracks on Spotify, even though it technically passes loudness targets.
- Wrong LUFS target: Integrated loudness levels that don't match platform requirements result in normalization surprises. Example: An EDM track mastered at -6 LUFS gets turned down by Apple Music's normalization algorithm, losing impact compared to native -14 LUFS tracks.
- Phase issues: Stereo phase cancellation can cause certain frequencies to disappear or shift dramatically when a track is played in mono. Example: A podcast-ready version of a single completely loses the kick drum because of uncorrected mid-side phase problems.
- Format conversion artifacts: Exporting to the wrong bit depth, sample rate, or codec without proper dithering introduces noise or aliasing. Example: An acoustic EP converted directly to 128kbps MP3 without mastering-grade dither sounds noticeably thin and metallic on earbuds.
Pro Tip: Build a pre-delivery mastering checklist for artists and run every track through it before exporting. A printed version of our audio mastering checklist works well as a physical reference right at your workstation.
In a 472-person blind test, human mastering was preferred over AI-generated masters, with AI tools frequently disqualified for introducing clipping and distortion artifacts. This reinforces why professional review, not just automated processing, is essential for credible releases.
Every one of these errors is correctable, but only if you catch it before the file goes out the door. The sections below go deeper on the most damaging categories.
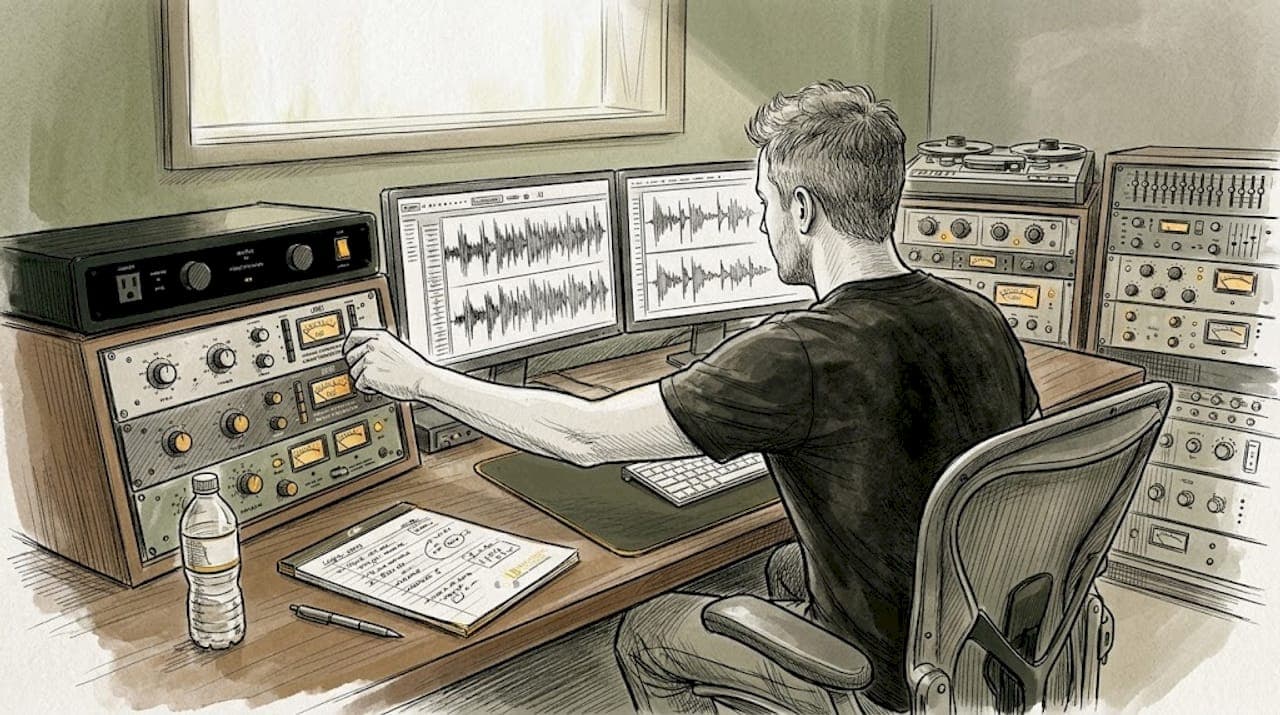
Digital clipping and distortion: Causes and fixes
Digital clipping is one of the most destructive mastering errors because it's immediately audible, hard to repair after the fact, and almost always the result of a workflow mistake rather than a deliberate creative choice. When audio waveforms are pushed past the absolute ceiling of 0 dBFS, the tops of those waveforms get sliced off. What you hear is a harsh, crackling, or buzzy quality that sounds nothing like intentional saturation.
Here's how to identify digital clipping during your mastering session:
- Check your DAW's master output meter. If you're seeing red clip indicators on playback, you already have a problem. Even a single sample of clipping will degrade the sound quality of a streaming encode.
- Use a true-peak meter, not just a sample-peak meter. True-peak measurement accounts for inter-sample peaks, which are distortions that occur between samples during digital-to-analog conversion. A track that reads -0.1 dBFS on a sample-peak meter can still be clipping at +0.3 dBTP (true-peak).
- Listen in isolation on different playback systems. Clipping sounds different on earbuds versus studio monitors. A section that passes on your speakers may sound broken on consumer headphones or a phone speaker.
- Use a clip detection plugin such as Bittersweet, Izotope Insight, or DMG TrackMeter. These tools flag exact locations of clipping across your timeline, so you can go back and reduce gain or adjust limiting at the source.
- Compare with a commercial reference track. Bring in a professionally mastered track from the same genre and A/B it against your master. If your track has any harshness or grit that the reference doesn't, clipping may be the culprit.
Streaming platforms including Spotify, Apple Music, Tidal, and Amazon Music all transcode your uploaded audio into lower-quality streaming formats like AAC or Ogg Vorbis. Clipped audio transcodes badly. The distortion that was mild in your WAV file can become severe in the compressed streaming version, and that's the version your audience actually hears. Labels hear clipping immediately during A&R review, and digital distributors like DistroKid and TuneCore have automated systems that flag and reject files with consistent clipping.

Pro Tip: Set your true-peak limiter ceiling to -1.0 dBTP for streaming delivery and -0.3 dBTP for physical media like CD. This gives the platform's transcoder headroom to work without introducing new distortion. Use metering tools that show both integrated LUFS and true-peak simultaneously to catch problems before export. Learning to enhance mastering clarity starts with gaining control over your ceiling, and a detailed guide on improving track clarity walks you through practical approaches for both streaming and vinyl delivery.
Loudness errors: Over-compression, LUFS targets, and post-normalization
Loudness is where some of the most misunderstood mastering errors happen. The loudness wars of the 2000s trained a generation of engineers to push masters as loud as possible. Now that every major streaming platform uses loudness normalization, that instinct can actively hurt your release. Knowing the right integrated loudness target for your genre and format is not optional. It's a core technical requirement.
Over-compression is closely tied to this. When you crush dynamics trying to hit a loud LUFS number, you sacrifice transient energy, punch, and the emotional impact of your music. A snare drum that should crack doesn't. A vocal that should breathe sounds smothered. The result is a track that may measure loud but feels small in comparison to well-mastered competition.
Here's how recommended loudness levels break down across common genres and platforms:
| Genre | Recommended LUFS | Streaming outcome if wrong |
|---|---|---|
| Pop / EDM | -7 to -9 LUFS | Normalized down, impact preserved if dynamics intact |
| Hip-hop / R&B | -8 to -10 LUFS | Distortion risk if over-compressed during mastering |
| Rock / Metal | -8 to -11 LUFS | Normalized down; clipping makes it worse after encode |
| Acoustic / Folk | -12 to -16 LUFS | Natural dynamics preserved; sounds open and airy |
| Classical / Jazz | -14 to -18 LUFS | Wide dynamic range rewards on high-quality streaming tiers |
LUFS targets by genre vary considerably, and matching your master to the right range is one of the highest-leverage decisions in the entire mastering process. Getting it wrong means your track either gets turned down automatically or loses its competitive energy on playlists.
Here's the part that surprises many artists: a louder master at -8 LUFS can actually sound fuller post-normalization than a native -14 LUFS master, because the additional gain staging during mastering often adds density and weight to the low end and midrange before normalization brings the level down. That said, this advantage disappears completely if over-compression has already squeezed the life out of the track. The goal is density through smart processing, not just gain.
The practical fix is to use an integrated loudness meter such as Nugen Audio's VisLM or the free Youlean Loudness Meter throughout your mastering session, not just at the end. Target your genre range, check true-peak, and then listen to how the track sounds at -14 LUFS playback level, which is what Spotify uses for normalization. For a detailed breakdown of achieving optimal loudness without sacrificing dynamics, and a forward-looking look at maximizing loudness in mastering across current and future playback systems, both resources are worth bookmarking before your next session.
Format conversion pitfalls: Artifacts, phase, and distribution failures
Even a perfectly mastered audio file can be ruined during the final export. Format conversion is where many artists, and even some engineers, let their guard down. You've finished the creative work. The levels are right. The sound is great. Then you export to the wrong sample rate, forget to apply dither, or send a stereo-width-heavy master to vinyl without checking mono compatibility, and the whole project suffers.
Here are the most common format-specific pitfalls:
| Format | Risk type | Typical outcome |
|---|---|---|
| Streaming (WAV to AAC/OGG) | Clipping artifacts from transcoding | Distortion heard by all listeners on platform |
| Vinyl | Inner groove distortion, phase issues | Needle skipping, muddy low end on final pressing |
| CD (Red Book) | Wrong bit depth, phase cancellation | Clicks, silences, or phase-flipped mono playback |
| Download (MP3) | Bit-rate artifacts without dither | Thin sound, metallic high-frequency smear |
In a blind test of mastering quality, listeners consistently identified format conversion artifacts as a primary reason for disqualifying AI masters, right alongside clipping. Human engineers with format-specific experience catch these errors because they know what to listen for in each delivery context.
Here are the most reliable fixes for format conversion errors:
- Apply dither correctly. When reducing bit depth from 24-bit to 16-bit for CD delivery, always apply dither. Skipping this step introduces quantization noise that is audible in quiet passages.
- Reference your master in mono before delivery. Phase cancellation issues that are invisible in stereo become obvious the moment you collapse to mono. Check this on speakers and in your meter.
- Test your streaming conversion before release. Upload a private version to your distributor and listen on multiple devices before going public. Transcoding errors surface in this step, not in your DAW.
- For vinyl, cut subs below 80Hz to mono and limit stereo content. Wide stereo information on very low frequencies causes the cutting needle to move unpredictably, which results in groove distortion and potential playback issues on consumer turntables.
- Confirm your sample rate matches the destination format. Streaming platforms prefer 44.1kHz or 48kHz. Resampling without quality conversion introduces aliasing that smears high-frequency content.
"We didn't notice the phase problem until after the vinyl pressing was already done. The kick drum practically disappeared in the center of the record. A mono check before sending to the plant would have caught it immediately." This kind of post-release discovery is more common than most artists want to admit, and it's completely avoidable with the right pre-delivery workflow.
Bookmark the mastering tips blog for ongoing format-specific guidance, and download our mastering error checklist to run through before every delivery.
Hard-learned lessons: What mastering errors teach us
After more than 44 years of professional mastering experience, we can say this honestly: every engineer, at every level, has sent out a master they later wished they could recall. A clipped cymbal that made it past the session. A vinyl side that had a phase problem nobody caught before pressing. These aren't signs of incompetence. They're signs that mastering is genuinely difficult work, and that preventable errors require active systems, not just good intentions.
The engineers who grow fastest aren't the ones who never make mistakes. They're the ones who build structured review processes around every session. Checklists win over memory. Fresh ears win over familiarity. A second human listen wins over relying on any automated tool, including AI platforms that can introduce the very errors you're trying to prevent.
Here's the contrarian take worth sitting with: some mastering errors, particularly unexpected saturation or phase-related frequency shifts, have pushed artists and engineers toward sounds they wouldn't have discovered otherwise. A vinyl pressing with a slightly warmer, compressed low end due to a mastering miscalculation became the defining sonic character of more than one beloved record. Errors are teachers. The goal isn't to be afraid of them. It's to understand them well enough that when something unexpected happens, you know whether it's a problem or a discovery.
Investing in quality mastering equipment and understanding what each piece of gear does gives you better diagnostic ability when something sounds wrong. The more you know about your signal chain, the faster you catch errors before they leave the studio.
Take your mastering to the pro level
Mastering errors cost artists time, money, and reputation, but none of the problems covered in this article are inevitable. With the right workflow, the right tools, and the right partner, your releases can meet every technical requirement while sounding exactly the way you intended.

At LB-Mastering Studios, our mastering and mixing services cover every format and distribution need, from streaming-ready stereo masters to vinyl lacquer preparation, all processed through our hybrid analog-digital signal chain with over 44 years of Grammy-winning experience behind every decision. Start by downloading our mastering checklist PDF to catch errors before they become problems. Then explore our mastering equipment page to see the tools we use to protect your sound at every stage of the process.
Frequently asked questions
What is the most common mastering error musicians make?
Digital clipping and over-compression are the most common mistakes, leading to audible distortion and streaming rejections. In a 472-person blind test, these exact errors were the primary reasons AI masters were disqualified by listeners.
What LUFS level should I aim for in mastering?
LUFS targets vary by genre: aim for -7 to -9 LUFS for pop and EDM, and -12 to -16 LUFS for acoustic genres to align with streaming platform normalization standards.
How can I avoid artifacts when exporting for different formats?
Double-check your dithering when reducing bit depth, reference your master in mono before delivery, and test your streaming platform's transcoded version on multiple devices before your public release date.
Are AI mastering services safe for final release?
AI mastering tools can introduce clipping and distortion that human engineers catch and correct, and blind test results confirm that listeners prefer human-mastered audio for professional releases where quality matters.