
TL;DR:
- Sample mastering finalizes a mix for optimal playback across all systems, improving commercial sound quality.
- Proper mastering processes include EQ, compression, stereo adjustment, limiting, and referencing to achieve desired loudness and dynamics.
- A great master depends on a quality mix and expert judgment, not just technical tools.
Mixing is not the final word on how your music sounds. Many independent artists and label teams put everything into a great mix, then release it without mastering, wondering why their tracks feel small compared to what they hear on Spotify or Apple Music. Sample mastering is the critical step that separates a polished commercial release from a demo that never quite lands. This article breaks down exactly what sample mastering is, how it works technically, what benchmarks matter, and how you can prepare your tracks to get the best possible results from a professional mastering engineer.
Table of Contents
- What is sample mastering?
- Core mastering processes: steps and goals
- Essential benchmarks: loudness, dynamics, and streaming requirements
- Common pitfalls and expert mastering tips
- A mastering engineer's take: what most guides miss
- Access professional mastering for your next project
- Frequently asked questions
Key Takeaways
| Point | Details |
|---|---|
| Mastering shapes the final sound | It turns well-mixed audio into a polished, consistent product ready for any platform. |
| Benchmarks matter | Meeting specific loudness and peak targets ensures your music sounds great on streaming services. |
| Start with a great mix | Mastering cannot compensate for weak mixes; quality begins with a solid foundation. |
| Expertise goes beyond software | Critical listening skills and referencing commercial releases are key to mastering success. |
What is sample mastering?
Sample mastering is the final technical and creative process applied to a finished audio mix before it reaches listeners. Think of it as the last quality checkpoint before your music goes out into the world. It is where a mix is shaped, polished, and optimized for playback across every system: car speakers, earbuds, streaming platforms, vinyl, and CD.
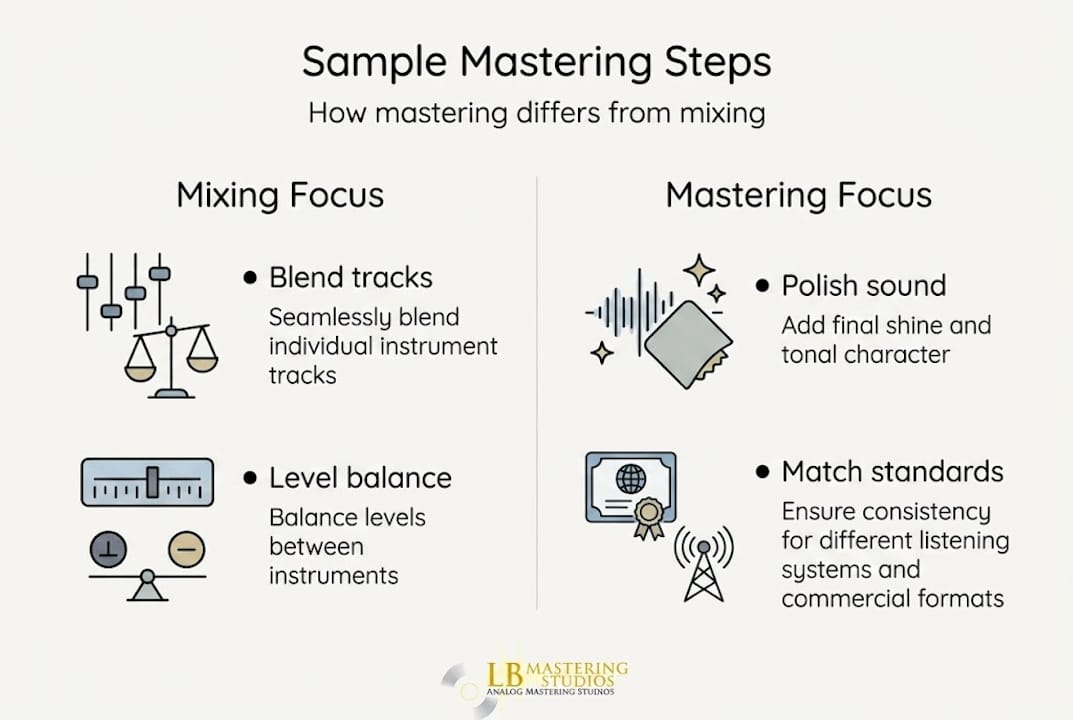
To understand mastering, you first need to distinguish it clearly from mixing. Mixing takes individual recorded tracks, such as drums, bass, guitars, and vocals, and blends them together into a single stereo file. The mix engineer balances levels, adds effects like reverb and compression, and creates the overall sound of a song. Mastering, on the other hand, works only with that finished stereo mix. The mastering engineer cannot reach into the individual tracks. What they receive is what they work with.
The word "sample" in this context refers to mastering individual audio samples or tracks, not musical samples in the way hip-hop producers use them. You can explore the history of music sampling to understand that context separately. Sample mastering means applying the mastering process to specific audio files, whether a single track, an EP, or a full album.
The core processes in sample mastering include:
- Equalization (EQ): Correcting tonal imbalances, removing low-end muddiness, adding clarity to the high end, and shaping the overall frequency response of the mix.
- Compression and multiband compression: Controlling the dynamic range so that loud and quiet passages feel cohesive and controlled without flattening the life out of the music.
- Stereo image adjustment: Widening or narrowing the stereo field, addressing phase issues, and ensuring mono compatibility for playback on phones and small speakers.
- Limiting: The final stage that brings the overall level up to competitive loudness while protecting against digital clipping.
- Dithering: When converting from 24-bit or 32-bit audio to the 16-bit format required for CD, dithering preserves low-level detail and prevents quantization noise.
A sound quality mastering guide walks through how each of these processes connects in real-world workflows. The result is a track that sounds consistent and competitive across all playback environments, not just the studio monitors where the mix was created.
"Mastering is 95% ears, and the chain order is critical. Surgical EQ comes first, limiting comes last. Commercial references serve as a compass, not a copy. A bad mix will produce a bad master, no matter what tools are applied."
That last point is worth repeating. Mastering is powerful, but it is not magic. A seriously flawed mix, with muddy low end, clashing frequencies, or a vocal buried in reverb, cannot be fully rescued at the mastering stage. The better your mix, the more the mastering engineer can elevate it.
Core mastering processes: steps and goals
Now that you know what mastering is, let's break down the process so you can see how your audio goes from mix to release-ready. A professional mastering session follows a specific order for very deliberate reasons. Doing things out of sequence produces inferior results.
Here is the standard sequence a mastering engineer follows:
- Preparation and critical listening: Before touching any tools, the engineer listens carefully to the mix on multiple playback systems. This reveals problems that the mix engineer may not have caught: a resonant frequency around 200 Hz, a harsh top end, or a mono incompatibility issue.
- EQ correction: Surgical equalization addresses specific problem frequencies. This comes first because fixing the tonal balance of the track affects everything that follows. If you apply compression to a mix that has too much low-end energy, you will get a pumping, uncontrolled result.
- Compression and dynamic control: Compression brings the overall dynamics into a range that feels professional and intentional. Multiband compression can address specific frequency ranges independently, for example tightening the low end without affecting the midrange presence.
- Stereo enhancement and width: If the mix needs more air or the stereo image needs adjustment, this is addressed after the dynamics are controlled.
- Limiting: The final limiter is the last device in the chain. According to streaming loudness benchmarks, target peaks should sit at -6 to -3 dBFS before the limiter, and the final true peak should not exceed -1 dBTP to prevent inter-sample distortion on streaming platforms.
- Referencing: The mastered track is compared to commercial releases in a similar genre, level-matched within ±0.5 dB to ensure a fair comparison. This step confirms the result is competitive without being over-limited.
- Final export and delivery: Files are exported in the required formats, whether WAV, AIFF, DDP files for CD replication, or specific formats for vinyl lacquer cutting.
Pro Tip: When you send your mix to a mastering engineer, leave at least 3 to 6 dB of headroom at the mix bus. Do not apply a limiter to the master bus before sending. Give the mastering engineer room to work.
The target for achieving optimal loudness in the current streaming environment is an integrated loudness of approximately -14 LUFS for Spotify. LUFS stands for Loudness Units Full Scale, which is the measurement standard that reflects how loud a track actually sounds to human ears over time, not just what the peaks measure. This is a more accurate loudness measurement than simple peak levels.

Crest factor is another concept worth understanding. It is the ratio between the peak level and the average (RMS) level of a signal. A higher crest factor means more dynamic range and musical punch. Over-limiting a master reduces the crest factor, making music feel flat and fatiguing to listen to. Great mastering preserves crest factor while hitting target loudness levels.
Essential benchmarks: loudness, dynamics, and streaming requirements
With the processes understood, it's crucial to see what targets mastering engineers aim for and why these specs shape your release's impact. Every major streaming platform has defined loudness normalization standards. Understanding these numbers protects your release from being turned down in volume automatically or sounding distorted.
Here is a breakdown of the key technical targets:
| Platform | Integrated LUFS target | True peak limit |
|---|---|---|
| Spotify | -14 LUFS | -1 dBTP |
| Apple Music | -16 LUFS | -1 dBTP |
| YouTube | -14 LUFS | -1 dBTP |
| Tidal | -14 LUFS | -1 dBTP |
| CD (Redbook) | Varies by genre | -0.3 dBFS |
These platform loudness targets mean that if you master your track too loud, the platform will turn it down automatically during playback. This defeats the purpose of over-limiting and actually costs you the punch and dynamics you sacrificed to get that extra loudness. The better strategy is to master to the target, preserve dynamic range, and let your music breathe.
For maximizing loudness for streaming, the practical workflow looks like this:
- Mix bus peaks should sit between -6 and -3 dBFS before any master bus processing begins.
- The integrated loudness of the mix (before mastering) should measure roughly -20 to -16 LUFS. This gives the mastering engineer room to apply gain structure and dynamics processing cleanly.
- The final limiter should bring the integrated level to the target LUFS for the intended platform, with true peaks at or below -1 dBTP.
- Crest factor should be preserved as much as possible to maintain the musical punch and sense of space in the track.
Consider a practical example. A dense electronic dance music (EDM) track might target -9 LUFS integrated for club playback, but that same track delivered to Spotify will be turned down to -14 LUFS by the platform. If the mastering was done properly with good dynamics, the normalized version still sounds punchy and powerful. If it was over-limited to achieve -7 LUFS, it will sound flat and lifeless when normalized.
A/B referencing is the final quality check on these benchmarks. A mastering engineer pulls up two or three commercial reference tracks in the same genre, matches their loudness to the mastered track within ±0.5 dB, and directly compares frequency balance, stereo width, and dynamic feel. This ensures your music is genuinely competitive, not just technically correct on paper.
Common pitfalls and expert mastering tips
We've discussed the standards; let's focus on how to avoid common mistakes and approach mastering with confidence. Even experienced producers can make decisions in the mix that create unnecessary challenges at the mastering stage.
Here are the most common pitfalls to avoid:
- Over-compressing the mix bus: If you have already applied heavy compression or limiting to your stereo bus before sending the mix, the mastering engineer has very little left to work with. The mix will sound over-processed and unable to take further treatment well.
- Not providing reference tracks: Many artists send tracks with no direction about the target sound. A reference track, something commercially released in your genre that embodies the energy and tone you want, gives the mastering engineer critical information.
- Ignoring arrangement problems: If your song has too many elements competing in the same frequency range, no amount of mastering EQ will fully solve the problem. Mastering EQ affects the entire mix simultaneously, not individual instruments.
- Listening only in one environment: If you mix and judge your tracks only on studio monitors, you may miss problems that are obvious on earbuds, a car system, or a Bluetooth speaker.
- Skipping a readiness check: Sending a mix that is not fully finished, or forgetting to bounce out the correct version, wastes everyone's time and can lead to expensive revisions.
"The 95% of mastering is done with your ears. Experienced engineers develop their critical listening through years of evaluating mixes on different systems, not through accumulating plugins. References serve as a compass, not a blueprint. The goal is to serve the artist's intent, not copy someone else's record."
Use a mastering checklist for artists before you submit your mix to any professional. Check that you have removed any processing from the master bus limiter, confirmed the mix is at the correct sample rate and bit depth (typically 24-bit, 44.1 kHz or 48 kHz), labeled your files accurately, and included a written brief describing your vision and any reference tracks.
Pro Tip: Always listen to your mix on at least three different playback systems before sending it to mastering. Use your studio monitors, a pair of standard earbuds, and a small Bluetooth speaker. Each system reveals something different, and your final assessment should agree across all three.
The foundation of a great master is a great mix. That is not a cliché; it is the single most important thing you can do to get value from professional mastering services. Invest in getting your mix right, and your mastering engineer can focus on elevating the work rather than correcting fundamental problems.
A mastering engineer's take: what most guides miss
Most technical guides focus on tools, numbers, and signal chains. They rarely address the most important variable in mastering: judgment. After 44 years of working in this industry, we can tell you that what separates a great master from a technically correct one is creative discernment, not a better plugin.
Mastering is deeply subjective. A processing chain that works perfectly for a warm jazz record will damage the energy of a hard-hitting hip-hop track. What flatters one artist's vocal tone will make another sound clinical and cold. This is why insider mastering tips from experienced engineers are worth more than any spec sheet. Developing your ear takes time and repeated exposure to real-world results.
The loudness wars have produced a generation of over-limited records that listeners increasingly reject. Dynamics are not a flaw. They are the difference between music that sounds alive and music that sounds exhausting. Artist intent matters. Emotional translation matters. A record that communicates exactly what the artist feels, with the right balance of energy and space, will always outperform a technically perfect but emotionally hollow master. Trust your vision, invest in skilled mastering, and let the music speak.
Access professional mastering for your next project
Ready to take your music from mix to release-ready with confidence? At LB-Mastering Studios, we bring over 44 years of Grammy-winning expertise to every project, from emerging independent artists to established record labels. Our hybrid analog-digital signal chain delivers the warmth, clarity, and loudness your music deserves.
Start by downloading our free mastering checklist, which walks you through everything you need to prepare before sending your tracks. When you are ready to move forward, explore our pro CD mastering services designed to meet the highest industry standards for streaming, CD, and vinyl. We offer free sample masters so you can hear the difference before you commit. Reach out directly to our engineer and let us help your music reach its full potential.
Frequently asked questions
What's the difference between mixing and mastering?
Mixing blends individual tracks into a single stereo file, while mastering polishes that finished mix for consistent, competitive sound across all playback systems. As this mastering guide notes, mastering is largely about trained ears and knowing exactly where and how to apply each process.
Why do streaming platforms require specific LUFS and peak levels?
Streaming services normalize loudness so all tracks play back at a balanced volume, and mastering to target LUFS values ensures your music maintains its dynamic character after normalization rather than being pushed down in volume unexpectedly.
Can mastering fix a poorly mixed track?
Mastering can refine and enhance a mix, but it cannot rescue a fundamentally flawed one. A weak mix will produce a weak master; getting the mix right is the most critical investment you can make before the mastering stage.
What are crest factor and dBFS in mastering?
Crest factor measures the ratio of peak level to average level in an audio signal, indicating how much dynamic punch a track retains. dBFS, or decibels full scale, is the reference point for digital loudness measurement, where 0 dBFS represents the maximum possible level before digital clipping occurs.