
You've spent weeks on your mix. The arrangement is tight, the performances are solid, and the levels feel balanced in your headphones. Then you play it next to a professional release and something feels off. The low end is muddy, the highs are harsh, and the whole thing sounds smaller. That gap between your mix and a radio-ready track is almost always closed in mastering. This guide walks you through every stage of the process, from preparing your files to verifying your final master, so your music competes on any platform and any playback system.
Table of Contents
- Why mastering is essential for professional sound quality
- Preparing your mix for professional mastering
- Mastering chain: Step-by-step process for pro sound
- Tools and reference standards for mastering
- Verifying results: Troubleshooting and listening checks
- Get professional results: Work with expert mastering services
- Frequently asked questions
Key Takeaways
| Point | Details |
|---|---|
| Mastering transforms mixes | Professional mastering polishes your mix, optimizing tonal balance, dynamics, and loudness for release. |
| Preparation is critical | Export your mix in high-resolution format with proper headroom and no master bus processing for best results. |
| Use subtle processing | Apply EQ and compression gently, referencing pro tracks and verifying on multiple systems. |
| Follow loudness standards | Match streaming platform targets with LUFS and true peak meters to ensure great playback everywhere. |
| Consider expert help | DIY mastering is possible, but professional studios offer nuanced quality and reliable distribution for every format. |
Why mastering is essential for professional sound quality
Mastering is the final step in audio post-production. It's the stage where a dedicated engineer listens to your stereo mix with fresh ears and makes targeted adjustments to tonal balance, dynamics, stereo width, and loudness for distribution-ready audio. Think of it as quality control combined with sonic finishing. A well-mastered track translates consistently whether it plays through a club system, a phone speaker, or a streaming platform.
One of the most common misconceptions is that mastering can fix a bad mix. It cannot. Mastering works with what you give it. If your low end is cluttered or your vocals are buried, mastering will make those problems louder and more obvious, not invisible. The goal of mastering is to enhance what is already working, not to rescue what is broken.
Here is what professional mastering actually addresses:
- Tonal balance: Correcting frequency imbalances that make a mix sound too bright, too dark, or too heavy in the low mids
- Dynamic control: Adding cohesion and punch without squashing the life out of the performance
- Stereo width: Ensuring the mix translates well in both stereo and mono
- Loudness: Bringing the track to competitive levels for streaming, CD, or vinyl without distortion
- Format consistency: Preparing separate masters for digital streaming, CD, and vinyl with format-specific adjustments
"Mastering is not about making things louder. It's about making things better. Loudness is just one tool in a much larger process."
When it comes to enhancing mastering clarity and achieving a polished result, the decision between DIY and professional mastering matters. DIY mastering is viable with discipline, but for official releases, a professional engineer brings trained ears, calibrated monitoring, and years of experience that are hard to replicate at home. Review the mastering essentials before you decide which route fits your project.
Having set the stage for why mastering matters, let's look at what you need before you start.
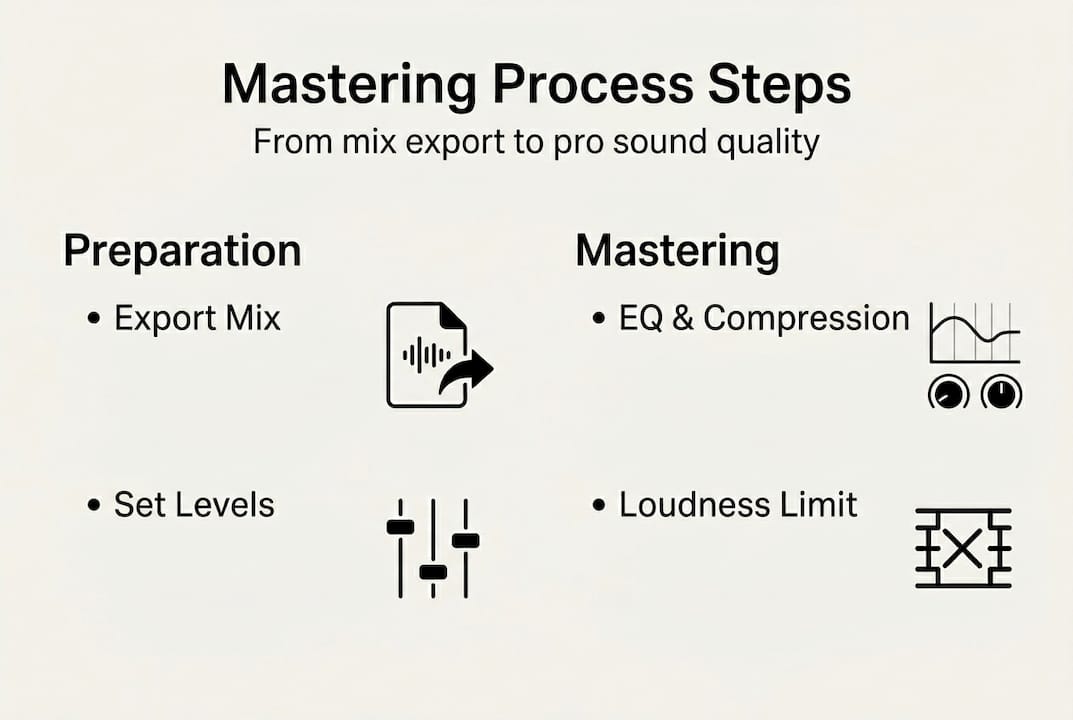
Preparing your mix for professional mastering
The quality of your master is directly tied to the quality of your mix export. Getting this step right is non-negotiable. Export your mix as a 24-bit WAV or AIFF file with peak levels sitting between -6 and -3 dBFS (decibels relative to full scale), and remove any limiting or EQ from your master bus before bouncing. That headroom gives the mastering engineer room to work without hitting the digital ceiling.

Here is a quick comparison of common export mistakes versus best practices:
| Export setting | Wrong approach | Best practice |
|---|---|---|
| File format | MP3 or 16-bit WAV | 24-bit WAV or AIFF |
| Peak level | 0 dBFS or clipping | -6 to -3 dBFS |
| Master bus processing | Limiter and heavy EQ active | All limiting and EQ removed |
| Sample rate | Converted or mismatched | Match your session rate |
| Headroom | None left | At least 3-6 dB of space |
Beyond the technical specs, preparation also means listening critically before you send anything. Check your mix on at least three different playback systems: studio monitors, headphones, and a consumer speaker or phone. If something sounds wrong on any of those systems, fix it in the mix before mastering begins.
Here are the key preparation steps to follow:
- Remove all master bus limiting, compression, and EQ before exporting
- Confirm peak levels land between -6 and -3 dBFS
- Export at 24-bit depth in WAV or AIFF format
- Include two or three level-matched reference tracks in the same genre
- Note any specific sonic goals or problem areas for your mastering engineer
Pro Tip: Download the audio mastering checklist before you export. It covers every technical detail so nothing gets missed. You can also review the mixing guide to make sure your mix is truly ready before it reaches the mastering stage. Check mixing and mastering rates early so you can plan your budget alongside your timeline.
With your mix properly exported, the next step is to understand the mastering process itself.
Mastering chain: Step-by-step process for pro sound
Professional mastering follows a logical signal chain. Each stage builds on the last, and the order matters. Here is the standard four-step mastering framework used by engineers at the highest level:
- Surgical EQ: Identify and remove specific resonances, mud, or harshness using a precise, narrow EQ. This is corrective work, not creative shaping.
- Tonal EQ: Shape the overall frequency character of the track. This is where you add warmth, air, or presence using broader, more musical EQ moves.
- Compression and clipping: Add cohesion and control transients. A compressor glues the elements together, while a clipper can add density and perceived loudness without the pumping artifacts of heavy compression.
- Limiting: Set the final loudness ceiling. The limiter catches peaks and brings the track to its target integrated loudness level for the intended format.
Here is how each stage affects the audio:
| Stage | Tool type | Primary goal | Typical range |
|---|---|---|---|
| Surgical EQ | Narrow parametric EQ | Remove resonances and mud | Narrow cuts, -3 to -6 dB |
| Tonal EQ | Broad shelving or bell EQ | Shape frequency character | ±1 to 2 dB |
| Compression | Multiband or stereo bus compressor | Glue and dynamic control | 1 to 2 dB gain reduction |
| Limiting | Transparent brickwall limiter | Final loudness and peak control | Target LUFS for format |
"Subtle processing is the mark of a great master. If you can hear the mastering, it's probably too much."
Pro Tip: Always A/B your processed signal against the unprocessed mix at the same volume. Level-matched A/B referencing keeps your ears honest and prevents you from over-processing. Aim for EQ moves of ±1 to 2 dB and compression gain reduction of 1 to 2 dB maximum.
For a deeper look at each stage, explore the mastering steps breakdown and the guide to loudness maximizing for streaming in 2026. You can also browse mastering equipment examples to understand what analog and digital tools bring to each stage of the chain.
Understanding the process is key, but knowing the tools makes all the difference.
Tools and reference standards for mastering
You do not need an expensive hardware rack to start mastering, but you do need accurate metering. LUFS (Loudness Units relative to Full Scale) is the standard measurement for integrated loudness across streaming platforms. Without a proper LUFS meter, you are guessing at your loudness target.
Here are the essential tools for any mastering setup:
- LUFS and true peak meters: Youlean Loudness Meter (free) and iZotope's metering tools are both reliable and widely used
- Transparent limiter: FabFilter Pro-L 2 is the industry standard for clean, musical limiting without artifacts
- Reference track player: A/B your master against commercial releases in the same genre at matched loudness levels
- Spectrum analyzer: Helps identify frequency imbalances that your ears might miss after extended listening
- Stereo correlation meter: Confirms mono compatibility before you finalize the master
Knowing your loudness target is just as important as hitting it. Streaming platform loudness targets in 2026 are: Spotify, YouTube, Tidal, and Amazon Music all normalize to -14 LUFS integrated with a true peak ceiling of -1.0 dBTP. Apple Music normalizes to -16 LUFS. Mastering louder than these targets means the platform will turn your track down automatically, which can make it sound thin or over-compressed compared to tracks that were mastered at the right level.
Pro Tip: Master to -14 LUFS for most streaming platforms and keep your true peak at or below -1.0 dBTP. For Apple Music, target -16 LUFS. Review the optimal loudness targets guide to see how these numbers apply to different genres and formats. The mastering tips blog also covers platform-specific considerations in detail.
For album mastering, match levels by ear across all tracks rather than chasing identical LUFS numbers. Some tracks naturally sit louder due to their arrangement and density. Forcing every track to the same number can make quieter, more dynamic songs feel lifeless.
Equipped with the process and tools, you're ready to verify and troubleshoot your sound quality.
Verifying results: Troubleshooting and listening checks
Finishing the mastering chain does not mean you are done. Verification is where you confirm that your master actually sounds professional across every listening environment your audience will use. This step catches problems that meters alone cannot reveal.
Here is a practical listening checklist before you finalize any master:
- Studio monitors: Your primary reference. Check tonal balance, stereo width, and low-end translation.
- Headphones: Reveals detail and stereo imaging that speakers can sometimes mask
- Phone speaker or laptop: Simulates how most streaming listeners will actually hear your music
- Car stereo: One of the most revealing playback environments for low-end and vocal clarity
- Mono check: Collapse the stereo field and confirm nothing important disappears or sounds phase-cancelled
"The master that sounds great everywhere is better than the master that sounds perfect in one room."
Ear fatigue is a real and underestimated problem. After 15 to 30 minutes of focused listening, your ears begin to compensate for what they are hearing, and you lose the ability to make accurate judgments. Take breaks, step away from the speakers, and return with fresh ears before making final decisions.
Pro Tip: A/B your finished master against a professional reference track at the same loudness level. If your track holds up in terms of mastering clarity and energy, you are in good shape. If it sounds smaller or duller, revisit your tonal EQ and limiting stages before sending to a pro mastering studio for a second opinion.
Common problems and their likely causes:
- Harsh or brittle highs: Over-limiting or too much high-shelf boost in tonal EQ
- Pumping or breathing: Too much compression gain reduction or a slow attack setting
- Thin or hollow low end: Insufficient low-shelf support or phase issues from the mix
- Mono incompatibility: Excessive stereo widening or mid-side processing in the mix or master
Armed with these checking strategies, your music will compete at the professional level.
Get professional results: Work with expert mastering services
You now have a complete mastering blueprint covering preparation, the signal chain, tools, loudness targets, and verification. Applying all of this takes practice, a treated listening environment, and calibrated ears. When the stakes are high and your release needs to compete at the highest level, working with a professional mastering engineer removes the guesswork entirely.
At LB-Mastering Studios, we bring over 44 years of Grammy-winning experience to every project, using a hybrid analog-digital signal chain built around analog mastering equipment that delivers warmth, clarity, and punch that software alone rarely achieves. Before you commit, download the free mastering checklist to make sure your mix is fully prepared. If you're releasing on vinyl, the vinyl mastering guide covers every format-specific consideration. We work with artists and labels worldwide, offering free sample masters and direct communication with your engineer so you always know exactly what you're getting.
Frequently asked questions
What audio format should I export for mastering?
Export your mix as a 24-bit WAV or AIFF file with peak levels between -6 and -3 dBFS and no master bus limiting or EQ applied, so the mastering engineer has full headroom to work with.
How loud should my mastered track be for streaming?
Target integrated loudness levels of -14 LUFS for Spotify, YouTube, Tidal, and Amazon Music with a true peak ceiling of -1.0 dBTP, and -16 LUFS for Apple Music.
Can I master my own music at home?
DIY mastering is viable with discipline, a properly treated listening space, and quality reference tracks, but professional mastering is strongly recommended for official releases.
What tools are essential for professional mastering?
You need reliable LUFS and true peak meters such as Youlean or iZotope, and a transparent brickwall limiter like FabFilter Pro-L 2 as your minimum starting point.
How do I avoid ear fatigue when mastering?
Limit focused listening sessions to 15 to 30 minutes, take regular breaks, and always verify your master across multiple playback systems before making final decisions.