
TL;DR:
- A great mix starts with proper preparation, including accurate tools, room treatment, and reference tracks.
- Fader balance and subtractive EQ are the most impactful steps before applying plugins or effects.
- Mono compatibility checks and careful reference listening ensure your mix translates well across systems.
How to mix songs like a pro: complete guide
Your track sounds great in your headphones, but the moment you bounce it down, something feels off. The vocals get swallowed by the guitars, the low end turns muddy, and the whole thing lacks the punch you hear on professional releases. This is one of the most common frustrations for independent musicians and producers. The truth is, mastering can only do so much. A great master starts with a great mix. This guide walks you through every step of the mixing process, from room setup and gain staging all the way to final bus processing and mastering-ready checks, so your tracks arrive at mastering ready to shine.
Table of Contents
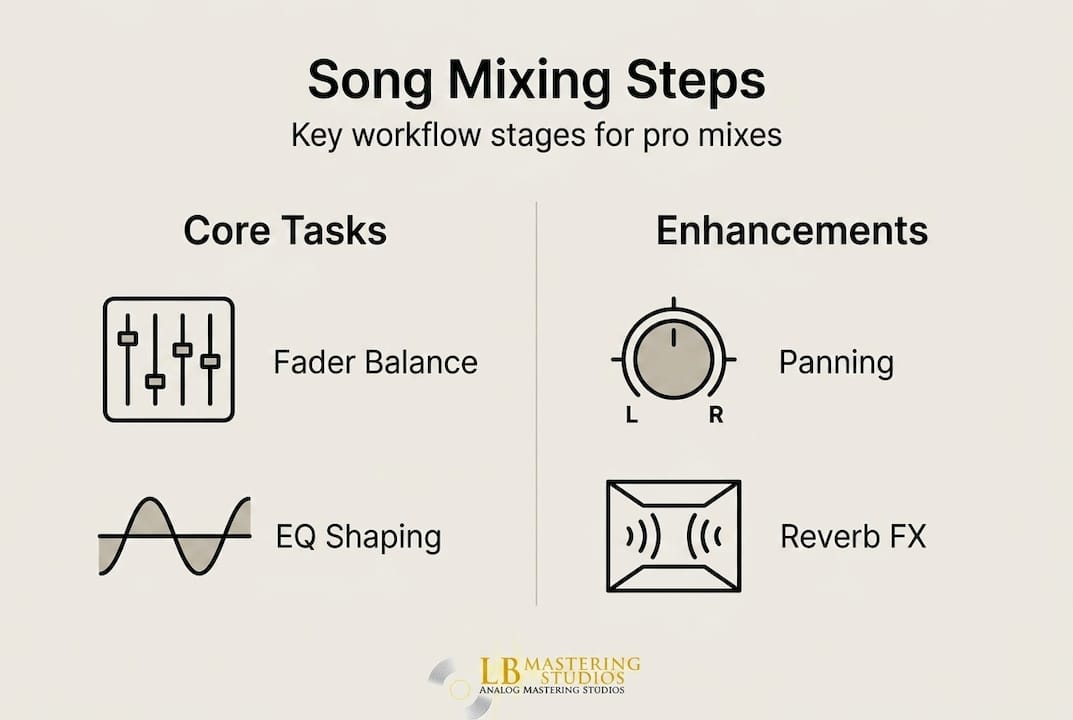
- Preparation: Essential tools and setup for song mixing
- Step-by-step mixing workflow: Balancing, EQ, and compression
- Spatial placement and effects: Panning, reverb, and automation
- Mix bus processing and final checks before mastering
- Our take: What most mixing guides miss
- Ready for pro mastering? Where to take your mix
- Frequently asked questions
Key Takeaways
| Point | Details |
|---|---|
| Balance first | Most mix clarity comes from careful fader adjustments before adding processing. |
| Use reference tracks | Comparing your mix to commercial releases helps catch issues and achieve genre-appropriate sound. |
| Check mono compatibility | Regular mono checks prevent phase cancellation and ensure mixes sound great everywhere. |
| Aim for proper headroom | Keep your mix peaks at -6 to -3 dBFS, so mastering engineers can polish your tracks effectively. |
| Leverage automation | Automation boosts energy in key song sections, giving your mix impact and flow. |
Preparation: Essential tools and setup for song mixing
Now that we've set the stage for why mixing matters, let's dive into what you'll need to get started. Skipping this preparation phase is one of the biggest reasons indie mixes sound amateur, even when the performances themselves are solid.
Song mixing involves balancing levels, panning, EQ, compression, and effects to create a cohesive track. That means your tools need to be accurate enough to hear what's actually happening in your audio. Here's what you need in your setup:
Hardware essentials:
- Audio interface: A quality interface with low-latency converters is non-negotiable. Models from Focusrite, Universal Audio, or RME give you clean, transparent conversion.
- Studio monitors: Flat-response monitors (not consumer speakers) reveal the truth in your mix. KRK Rokits, Yamaha HS series, or Adam Audio T series are reliable starting points.
- Closed-back headphones: Use these as a secondary reference, not your primary mixing tool. Sony MDR-7506 or Beyerdynamic DT 770 Pro are industry standards.
- Computer: Any modern machine with at least 16GB RAM and a multi-core processor handles most DAW sessions without dropout issues.
Software and plugins:
Your DAW (Digital Audio Workstation) is your central workspace. Pro Tools, Logic Pro, Ableton Live, and Studio One all offer professional-grade mixing environments. Inside that DAW, you'll rely on EQ, compressors, reverbs, delays, and saturation plugins. Start with stock plugins. They're often better than people admit, and they teach you fundamentals without the distraction of endless third-party options. Understanding audio mixing basics first makes every plugin decision more intentional.
Room acoustics matter more than most producers realize. A room with untreated reflections gives you a false picture of your low end and stereo image. Even basic acoustic panels on the first reflection points (side walls and ceiling) make a measurable difference. If you can't treat your room, working primarily on headphones with a plugin like Sonarworks SoundID Reference is a practical alternative.
| Tool | Budget option | Professional option |
|---|---|---|
| Audio interface | Focusrite Scarlett 2i2 | Universal Audio Apollo |
| Studio monitors | Yamaha HS5 | Genelec 8030C |
| Headphones | Sony MDR-7506 | Sennheiser HD 650 |
| DAW | Reaper | Pro Tools Ultimate |
Reference tracks are one of the most underused preparation tools. Choose two or three commercially released songs in your genre that represent the sound you're targeting. Import them into your DAW session and level-match them to your mix before comparing. This keeps your ears calibrated throughout the session.
Pro Tip: Before you touch a single plugin, set your gain staging correctly. This means every track's input level should peak between -18 and -10 dBFS on average, giving you clean signal flow and plenty of headroom. Use our free mastering checklist to keep these steps organized before you start.
Step-by-step mixing workflow: Balancing, EQ, and compression
With your tools and room ready, it's time to begin mixing, step by step. The order in which you approach mixing tasks matters enormously. Most common mistakes happen when producers jump straight to heavy processing before establishing a clean balance.
Here is a reliable mixing workflow:
- Gain staging first. Set your track levels so that peaks for your kick drum hit around -18 to -10 dBFS, and your master peak reaches -6 to -3 dBFS. This gives mastering engineers the headroom they need to work.
- Build the static mix. Use only faders and panning. Get as close to a finished-sounding mix as possible before touching any plugins. You'll be surprised how far fader balance takes you.
- Balance with faders before processing. Resist the urge to reach for EQ or compression too soon. A well-balanced static mix needs far less processing than a poorly balanced one.
- Apply subtractive EQ. This is where most mixes get cleaned up. Cut mud at 200 to 400Hz, address harshness in the 3 to 4kHz range, and apply a high-pass filter around 80 to 100Hz on non-bass and non-kick instruments. Cutting before boosting is almost always the smarter move. For more detail, explore analog EQ tips that explain why subtractive shaping works so well in practice.
- Add compression for dynamics control. A starting point that works across many sources: ratio 3:1, attack 5 to 30ms, release 100 to 300ms. Adjust attack to let transients breathe or tighten them depending on the element.
- Additive EQ after compression. Once dynamics are under control, gentle boosts of 1 to 3dB can add presence, air, or warmth without causing problems.
"The best mixes in history were built on fader balance, not plugin chains. Processing enhances a good balance. It cannot create one."
Think about what the music is supposed to feel like emotionally. A dense rock track needs grit and impact. A sparse acoustic song needs air and intimacy. Your plugin choices should serve that emotional goal, not work against it.
Pro Tip: After every major processing decision, bypass all your plugins and listen to the raw fader balance again. If the mix sounds better with everything bypassed, you're over-processing. The goal is for your processing to enhance what the faders already built.
Spatial placement and effects: Panning, reverb, and automation
After setting your basic balance and tone, spatial placement and effects bring your mix to life. A mix that sounds great in mono but flat in stereo is missing one of the most powerful tools available to you.

Panning fundamentals: Center your kick, snare, and lead vocals. These are anchor elements that every listener expects to hear front and center. Pan rhythm guitars hard left and right to create width. Spread background elements and pads wide for depth. Avoid panning too many mid-range elements to one side, as this creates an imbalanced stereo image.
| Element | Pan position | Reason |
|---|---|---|
| Kick drum | Center | Anchor, low frequency power |
| Snare | Center | Rhythmic anchor |
| Lead vocal | Center | Primary focus |
| Rhythm guitars | Hard left / right | Width and energy |
| Pads and synths | Wide stereo | Depth and space |
| Bass | Center | Mono-compatible low end |
Reverb choices and settings:
- Room reverb: Short decay (0.3 to 0.8 seconds) for drums and percussion. Adds natural size without washing out the mix.
- Plate reverb: Works well on vocals and snare. Smooth tail with a distinct character.
- Hall reverb: Long decay (1.5 seconds and above) for pads and strings. Use sparingly or it muddles the mix quickly.
Always run reverb on a send channel, not directly on the source. This lets you control the wet signal independently and apply EQ to the reverb return, removing low-end buildup that smears your low frequencies.
For enhancing mix clarity, high-pass filter every reverb return at around 150 to 200Hz. This single move cleans up more low-end mud than most EQ moves on individual tracks.
Automation lifts your mix from static to dynamic. Increase vocal level and reverb send during the chorus to create that lift listeners expect. Pull back reverb in verses to give the lead vocal intimacy. Automate filter sweeps into transitions for a polished, professional feel.
Pro Tip: Always check your mix in mono. Flip your mix to mono using a utility plugin and listen for elements that disappear or sound weak. Mono compatibility issues cause phase cancellation that wipes out crucial parts of your track on smaller speakers and club systems. Fix these problems before moving forward.
Mix bus processing and final checks before mastering
With your instruments in place and space defined, you'll need to polish and check your mix before sending it to mastering. This stage is about subtle refinement, not dramatic changes.
Mix bus processing workflow:
- Glue compression: Apply a subtle glue compressor on your mix bus with a low ratio (2:1 or less), slow attack, and medium release. The goal is 1 to 2dB of gain reduction at most. This makes the mix feel cohesive without squashing dynamics.
- Mix bus EQ: Small shelving boosts or cuts. A gentle high-shelf boost around 12kHz adds air. A small dip around 250 to 300Hz reduces muddiness in the overall picture.
- Mix bus limiter: Keep your mix bus limiter set conservatively. Aim to catch only the very highest transient peaks. Leave the heavy limiting for mastering.
Reference tracks for quality control: Level-match your reference tracks before doing any A/B comparison. If your reference plays louder, your mix will always sound worse simply due to volume. Gain-matched comparisons reveal actual tonal and dynamic differences.
| Streaming platform | Target loudness | Format |
|---|---|---|
| Spotify | -14 LUFS (integrated) | Lossy/lossless |
| Apple Music | -16 LUFS (integrated) | Lossless |
| YouTube | -14 LUFS (integrated) | Lossy |
| Tidal | -14 LUFS (integrated) | Lossless/HiFi |
Loudness targets matter. Spotify top tracks average around -8.4 LUFS in integrated loudness, with pop and EDM genres ranging from -4 to -9 LUFS. Your mix doesn't need to hit these numbers, but knowing the targets helps you and your mastering engineer make smarter decisions.
Phase checks and mono compatibility: Run a phase correlation meter on your mix bus. Values near +1.0 are mono-compatible. Values approaching -1.0 signal phase issues that will cause problems in distribution.
AI mixing tools have improved dramatically. Blind test results show AI mixing performs within a measurable range of human engineers for speed and consistency, particularly in EDM and pop genres. Where human engineers still hold a clear advantage is in acoustic warmth, artistic intent, and genre nuance. Knowing when to lean on each approach is a strategic decision, not a matter of pride. Explore our mixing and mastering rates to see how professional human mixing compares in value.
For vinyl releases, check our vinyl mastering tips before finalizing your mix. Vinyl has specific frequency and dynamic requirements that affect mixing decisions, particularly in the low end and stereo width.
Pro Tip: Export a rough mix WAV file and listen to it on three different systems: your studio monitors, your car speakers, and your phone speaker. If it translates clearly on all three, your mix is in strong shape. Use our mastering checklist to verify each step before sending your files.
Our take: What most mixing guides miss
Having covered workflow, spatial, and finishing details, let's reflect on the deeper lessons only experienced mixers learn. After working with hundreds of artists and producers over decades, we've noticed a consistent pattern: the mixes that improve most dramatically aren't the ones loaded with expensive plugins. They're the ones where the engineer committed to fader balance first.
Expert mixers achieve about 80% of their results through fader balance alone, with minimal processing. This runs counter to what most tutorials teach, where plugin chains are the focus from minute one. The best mixing advice we can give you is to spend twice as long on your static mix before reaching for a single plugin.
Mono checks and reference tracks aren't optional steps to rush through at the end. They're habits that need to be woven into your entire session. We see more mixes arrive for mastering with phase problems that a quick mono check would have caught immediately.
Human mixing still carries real advantages in clarity and artistic intent that automated systems struggle to replicate, particularly in acoustic and live-recorded music. AI tools are genuinely useful for speed and consistency, but they don't yet understand the emotional arc of a song the way an experienced engineer does. Knowing which tool serves your music best is itself a skill worth developing.
Carving space through EQ and panning solves 90% of common problems before a single effects plugin enters the picture. Most over-processed mixes aren't over-processed because engineers love plugins. They're over-processed because the underlying balance was never right to begin with.
Ready for pro mastering? Where to take your mix
After you've mixed your track, having the right resources and services for mastering is the logical next step. A polished mix deserves a mastering engineer who can honor the work you've put in and take it the final mile.

At LB-Mastering Studios, we bring over 44 years of experience and Grammy-winning expertise to every session. Whether you're releasing to streaming platforms, CD, or vinyl, our team works directly with you to ensure your mix reaches its full potential. Use our audio mastering checklist to confirm your mix is ready, then explore our full range of mixing and mastering services to find the right fit for your project. For physical releases, our CD mastering services deliver the warmth and precision your music deserves. We offer free sample masters so you can hear the difference before committing.
Frequently asked questions
What is the difference between mixing and mastering?
Mixing balances and processes individual tracks to create a cohesive song, while mastering further polishes the completed mix for distribution across streaming, CD, and vinyl formats.
How loud should my mix be before mastering?
Aim for master peak levels between -6 and -3 dBFS, which gives your mastering engineer sufficient headroom to apply processing without clipping or distortion.
Do I need reference tracks to mix professionally?
Yes. Level-matched reference tracks help you benchmark your mix against professional releases and catch tonal or loudness issues that ear fatigue makes easy to miss.
Can AI mixing replace human engineers?
AI mixing performs well for speed and consistency in pop and EDM, but human engineers still lead in acoustic warmth, artistic intent, and nuanced genre decisions that automation cannot fully replicate.
What is mono compatibility and why does it matter?
Mono compatibility ensures your mix sounds clear and avoids phase cancellation on mono playback systems, which include many club speakers, phones, and smart speakers used by streaming listeners every day.