 how-to
Best Practices for Exporting Audio Stems
Table of Contents
- Stems vs. Multitracks: What to Deliver and When
- Session Prep Before You Touch Export
- Audio Stem Export Settings That Prevent Revisions
- How to Prepare Stems for Mixing Without Losing Your Sound
- Stem File Naming Conventions and Folder Structure
- How to Export Stems in Ableton Live (and Other DAWs)
- A/B Verification: Checking Exports Against the Session
- Delivery Specs by Recipient and Common Mistakes to Avoid
- Frequently Asked Questions
Last Updated: October 8, 2026
Stems vs. Multitracks: What to Deliver and When
Best practices for exporting audio stems start with one question: what does the recipient actually need? Get that wrong and every downstream decision suffers. At LB-Mastering Studios, we've received thousands of stem packages over 44 years.
Audio stems are submixes of related tracks, grouped into deliverable files. A drum stem might contain kick, snare, overheads, and room mics summed into one stereo file. Multitracks are the individual, ungrouped tracks exactly as they sit in your session.
That distinction decides your whole export plan:
| Deliverable | What It Contains | Best For |
|---|---|---|
| Stereo mix | One finished two-channel file | Straight mastering, quick turnaround |
| Stems | Grouped submixes, usually 4-8 files | Stem mastering, remixing, sync licensing |
| Multitracks | Every individual track, raw | Full remix, re-mixing from scratch |
When a Stereo Mix Is Enough
A stereo mix is enough when your mix is finished and you only need final polish, the mastering engineer shapes tone, dynamics, and loudness without touching your internal balance. Send stems when you want the engineer to adjust the relationship between elements, like lifting the vocal or tightening the low end. Multitracks go to a mix engineer, not a mastering engineer; if someone asks for multitracks, they are rebuilding your mix.
Session Prep Before You Touch Export
Clean your session before you export anything, this prevents most revision requests. Lock your sample rate first; changing it after export creates pitch and timing problems. Then work through this list:
- Set the session sample rate and leave it alone
- Remove unused tracks and muted clutter
- Delete empty channels and stray audio
- Consolidate every track from bar one
- Name every track clearly before export
- Check that no track clips
Audio Stem Export Settings That Prevent Revisions
The right audio stem export settings come down to four choices: format, sample rate, bit depth, and level.
Here is what we recommend for every delivery:
- Format: WAV or AIFF, both lossless and uncompressed
- Sample rate: match your session exactly
- Bit depth: 24-bit
- Peak level: around -6 dBFS, never touching 0
- Headroom: leave room for processing
Never send MP3s for mixing or mastering. Lossy compression throws away data the engineer cannot get back.
Guidance from Audio Mixing Mastering on labeling and organizing stems notes that WAV is widely accepted and AIFF is a suitable alternative.
Watch your gain staging. If your mix peaks near 0 dBFS, you have no headroom left.
How to Prepare Stems for Mixing Without Losing Your Sound
Learning how to prepare stems for mixing means deciding what travels with each file. Printing effects bakes them into the stem; bypassing sends the raw signal and lets the next engineer rebuild your sound. Neither is wrong, it depends on who receives the files. Keep these rules in mind:
- Print anything central to your sound, like a signature vocal chain
- Bypass anything the next engineer should control
- Always include a rough stereo mix as a reference
- Never send a stem that depends on a sidechain from another stem
Effects, Automation, and Sidechains: Print or Bypass?
Print effects when they define the sound; bypass them when the receiving engineer needs control. Automation is different, volume rides and filter sweeps are part of the performance, so print them. Sidechains almost always need printing, since a stem relying on another track's signal will not behave the same once separated. Confirm exported files follow your tempo map, and print any outboard gear pass before export.
Stem File Naming Conventions and Folder Structure
Good stem file naming conventions save everyone time. A clear name tells the engineer what the file is before they open it.
Use this pattern:
ArtistName_SongTitle_StemName_Tempo_Key.wav
For example: TheWilds_MidnightDrive_Drums_120bpm_Amin.wav
Then build a folder mirroring the session:
/SongTitle_Stems /01_Drums /02_Bass /03_Guitars /04_Keys /05_LeadVocal /06_BackingVocal /Reference_Mix Number your folders in session order and keep every file starting at the same point.
How to Export Stems in Ableton Live (and Other DAWs)
Every DAW handles export a little differently, but the goal is the same: aligned, lossless files from a shared start point. Run one DAW-neutral checklist first, then apply the DAW-specific steps.
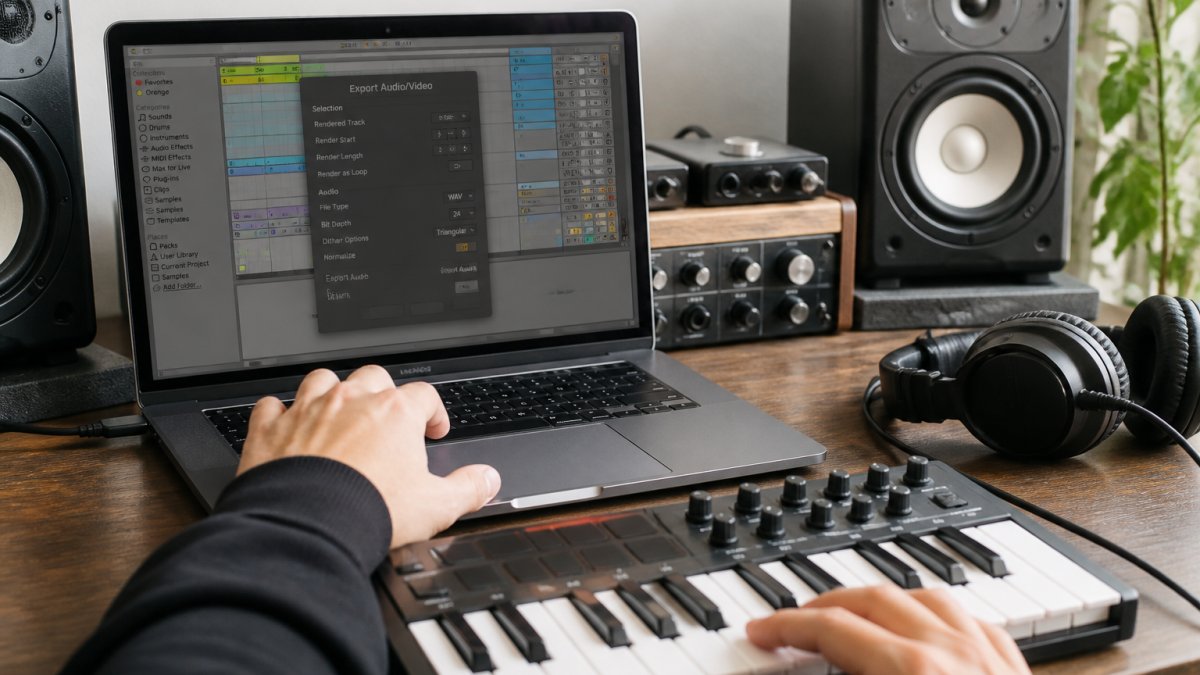
The DAW-Neutral Export Checklist
Run these steps in order, whatever DAW you use:
- Set the export range to start at bar one (or the first downbeat of the song), not at the first audio event
- Confirm the session sample rate and bit depth before you open the export dialog
- Solo or route only the group you are exporting, never leave muted or empty tracks in the selection
- Choose WAV (or AIFF), 24-bit, session sample rate, no dithering on the way out
- Export with the same start and end point for every stem
- Re-import the exported files into a fresh session and confirm alignment before repeating
- Repeat for each stem, then sum them and compare against your stereo mix
DAW-Specific Steps
Ableton Live: The official Ableton Live documentation on exporting audio covers the export workflow.
Logic Pro: Use Export Tracks as Audio Files, one file per track or summing stack.
FL Studio: Export each mixer channel individually rather than the master.
Pro Tools: Consolidate each track from the session start, then use Export Clips as Files or Bounce Mix per track.
Studio One, Cubase, and Reaper: All three offer a "stem export" or "export selected tracks" mode.
Handling Tempo Changes, Automation, Buses, and External Hardware
These session-dependent details make stems sound different when played together, and most export guides skip them.
- Tempo changes: Confirm exported files follow the tempo map, a stem exported at fixed tempo will drift the moment the song changes feel.
- Automation: Volume rides, filter sweeps, and pan moves are part of the performance. Print them, or the receiving engineer hears a static version of a dynamic part.
- Buses and groups: Export the group output, not the individual tracks feeding it, unless the recipient asked for multitracks. A drum bus with glue compression printed is a stem; the individual kick, snare, and overheads are multitracks.
- Sidechains: Print the ducking into the bass stem or the relationship disappears once separated.
- External hardware: Print any outboard gear pass before export, the receiving engineer cannot recreate a hardware chain they do not have.
A/B Verification Before You Send
Import every stem back into a fresh session, line them up at bar one, and compare against your stereo mix. Check alignment, listen for clicks and clipped peaks, and confirm no effect tail got cut off. Then sum the stems and phase-invert them against the original mix, if they cancel to silence, your export is a perfect match.
A/B Verification: Checking Exports Against the Session
Always A/B your exports against the session before sending, this catches problems invisible in a file list. Import every stem into a fresh session, line them up at bar one, and check: do the stems together match your stereo mix? Are start points aligned? Any clicks, pops, or clipped peaks? Did any effect tail get cut off? If the summed stems sound different, fix it before delivery, not after.
Delivery Specs by Recipient and Common Mistakes to Avoid
Delivery specs change with the recipient. A mix engineer, a mastering engineer, and a sync library each want something different, and the format that works for one will slow down the other.
Specification Matrix by Use Case
| Recipient | Format | Bit Depth | Sample Rate | What to Include |
|---|---|---|---|---|
| Mix engineer | WAV | 24-bit | Session rate | Multitracks plus rough stereo mix |
| Mastering engineer | WAV | 24-bit | Session rate | Stereo mix or stems peaking around -6 dBFS |
| Stem mastering | WAV | 24-bit | Session rate | Grouped stems, aligned, plus reference mix |
| Remix or sync licensing | WAV | 24-bit | Session rate | Stems plus instrumental, clean, and a cappella versions |
| Archival | WAV | 24-bit | Session rate | Stems plus multitracks plus session notes |
A few notes: match the session sample rate, do not upsample a 44.1 kHz session to 96 kHz just to look professional, since you add file size without information. 24-bit is the working standard because it preserves headroom and noise floor. For sync or licensing, instrumental and clean versions are not optional extras, a music supervisor who has to request them separately will often move on.
Packaging, Metadata, and Handoff Communication
The export is only half the job.
Folder structure: Mirror the session, a folder per stem, numbered in session order, with the reference mix in its own top-level folder.
Naming: Use a consistent pattern with artist, song, stem name, tempo, and key, for example TheWilds_MidnightDrive_Drums_120bpm_Amin.wav.
Track list: List every stem in session order.
Transfer: Use a service that preserves file integrity and gives a download confirmation.
Common Mistakes to Avoid
- Stems that start at different points
- MP3s or other lossy files sent for mastering
- Clipped peaks with no headroom
- Muted or empty tracks left in the package
- No reference mix included
- Vague file names like
audio_01 - Return tracks not printed, leaving stems drier than the mix
- Missing instrumental or clean versions for sync delivery
- No readme, forcing the recipient to guess at tempo, key, or printed effects
Each one costs time and is easy to avoid with a checklist.
Frequently Asked Questions
Should I export stems as WAV or AIFF?
Both are lossless and uncompressed, so either works for exporting audio stems. WAV is the most widely accepted delivery format across DAWs and studios, while AIFF is common among Logic Pro users and Mac-based workflows. What matters most is avoiding compressed formats like MP3, which discard audio data and cannot be undone. Stick with one lossless format for the entire delivery, keep bit depth at 24-bit, and match the sample rate of your session so nothing gets resampled along the way.
Should all audio stems start at the same point?
Yes. Every stem should begin at the same timeline position, typically bar one, even if the instrument does not enter until later. This keeps files aligned when the mix engineer drops them into a session, so no manual nudging is needed. If a stem starts at its own first note instead, the receiving engineer has to guess where it belongs, which is one of the most common causes of revision requests. Export the full song length for each stem so the arrangement stays intact.
Do I need to include effects when exporting stems?
It depends on the effects. Commit effects that are part of the sound, such as amp sims, distortion, or a signature reverb on a lead, and print them into the stem. Leave corrective processing like EQ and compression for the mix engineer to handle. For time-based effects, print the wet signal and include a dry alternative when the effect is central to the part. Always let reverb and delay tails ring out past the last note rather than cutting them at the clip edge.
How should I name and organize stem files?
Use a consistent pattern such as SongTitle_Tempo_StemName, for example MySong_120BPM_Drums.wav. Number the files in mix order (01_Drums, 02_Bass, 03_Guitars) so they load in the right sequence. Avoid spaces, special characters, and vague names like audio1 or final2. Place everything in a single folder named after the song, and include a text file listing the tempo, sample rate, bit depth, and any notes about the session before you zip and send it.