
 comparison
Analog vs Digital Signal Chain for Mastering
Table of Contents
- Defining Analog vs Digital Mastering Signal Chains
- Sonic Characteristics: Analog Warmth vs Digital Transparency
- Benefits of Analog Outboard Gear in Professional Mastering
- Workflow Efficiency and Recallability Across Both Approaches
- Hybrid Mastering Workflow Integration for Maximum Control
- Mastering Headroom Requirements and Gain Staging Fundamentals
- Choosing Your Signal Chain: Practical Considerations
- Conclusion: Working With Professional Mastering Engineers
- Frequently Asked Questions
Last Updated: September 27, 2026
Defining Analog vs Digital Mastering Signal Chains
When it comes to the analog vs digital signal chain for mastering, you're choosing between two fundamentally different approaches to shaping your final mix. An analog signal chain routes audio through physical hardware, compressors, EQs, tape machines, and summing amplifiers, where sound is processed as continuous electrical current. A digital signal chain keeps everything in your DAW, using software plugins to manipulate audio as discrete numerical samples. At LB-Mastering Studios, we've worked with both extensively, and the distinction matters far more than most producers realize.
Sonic Characteristics: Analog Warmth vs Digital Transparency
Analog warmth results from harmonic distortion and saturation in analog circuitry. When audio passes through transformers, tubes, and transistors, it picks up subtle harmonic coloration at every stage, preamps, compressors, tape machines, creating what listeners perceive as "warmth" or "musicality."
Digital transparency aims for accuracy, introducing minimal harmonic coloration so audio remains pristine. This makes it easier to hear problems, make corrections, and achieve competitive loudness without distortion.
The real tension is control versus character: analog gear imparts character whether you want it or not, while digital tools let you decide exactly what happens at each stage.
Audio Engineering Society research on harmonic distortion in mastering confirms that listeners perceive harmonic complexity as "warmth," even when the frequency response remains flat. This means analog's advantage isn't about adding bass or presence, it's about the specific way harmonics are distributed.
Benefits of Analog Outboard Gear in Professional Mastering
Professional analog outboard gear delivers concrete advantages plugins struggle to replicate. A high-quality mastering compressor shapes transients, adds harmonic saturation, and responds to dynamics in ways determined by its physical design, interactions that happen at the circuit level and can't be fully emulated in software.
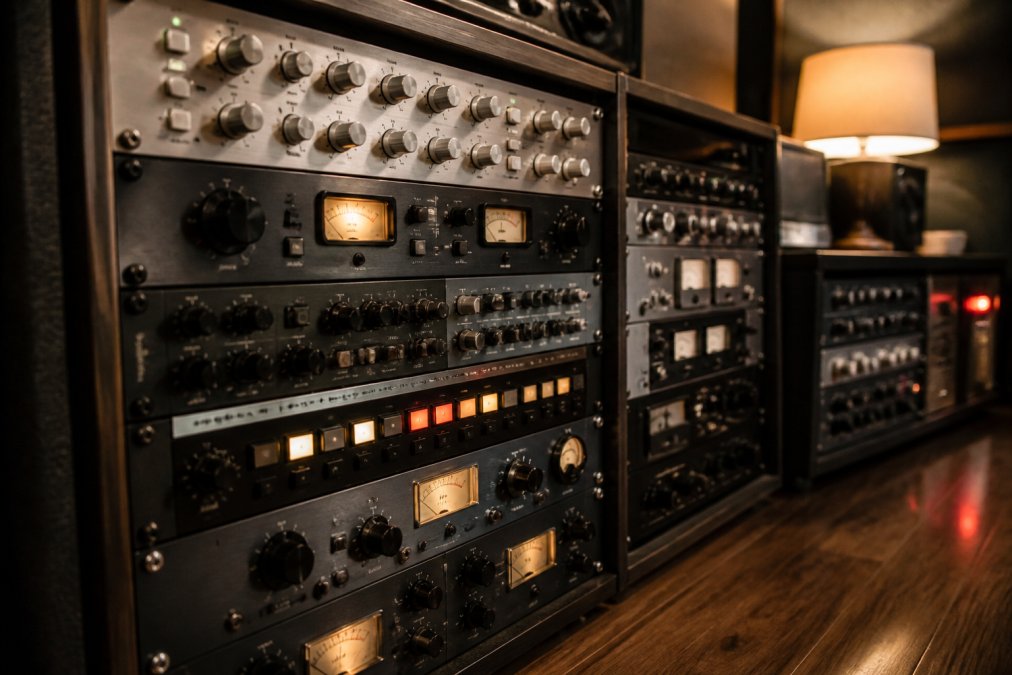
Analog gear forces intentional decision-making: you set parameters and commit, with no endless tweaking. This constraint often leads to better results because you understand what each piece of gear does rather than chasing numbers on screen.
Analog summing amps and monitoring chains have their own sonic signature that translates better across varied listening environments than purely digital monitoring, which matters for masters heard on countless playback systems.
Workflow Efficiency and Recallability Across Both Approaches
Digital dominates in recallability: save a session and recall every parameter instantly, undo changes, and A/B approaches via snapshots. This efficiency matters for client revisions and experimentation.
Analog workflows are slower, you write settings on paper and manually reset hardware for recalls. However, this limitation forces faster commitment to decisions, which can lead to better results without endless option paralysis.
Hybrid approaches solve this: use analog gear for specific stages (compression, saturation, summing) while keeping workflow in the DAW, giving you analog character with digital recallability.
Hybrid Mastering Workflow Integration for Maximum Control
A hybrid mastering workflow routes audio from your DAW to analog outboard gear for specific processing (compression, EQ), then returns it to the DAW for final limiting and metering before export.
Latency Compensation: The Technical Challenge Most Engineers Overlook
Round-trip latency (typically 5-50 milliseconds) creates a phase offset between your dry DAW signal and the analog-processed return. If latency compensation is disabled or misconfigured, you'll hear comb filtering, loss of clarity, and a hollow character that no EQ can fix.
Most DAWs offer automatic latency compensation, but it only works if you've correctly configured your audio interface settings and the DAW knows the exact latency value of your hardware chain.
Measure round-trip latency: Use a test tone generator to send a click to your analog hardware and back into the DAW on a separate track. Measure the sample delay between waveforms and cross-reference against your DAW's latency display.
Enable hardware input monitoring: Route your master bus to analog output, return the analog input to a new track, and enable "input monitoring." Listen for phase coherence; if the combined signal sounds thin or hollow, latency compensation is miscalculated.
Use a phase correlation meter: Most mastering plugins include a phase correlation display. When signals are perfectly in phase, the meter reads +1.0. If below +0.8, adjust your DAW's latency value until the meter peaks at +1.0.
Account for converter latency: High-quality AD/DA converters introduce 1-3 milliseconds of latency per conversion. Add this to your DAW's reported value if your interface doesn't allow custom latency offset.
Common mistake: sending a stereo pair to analog hardware and returning it on a different output with different latency characteristics. Solution: route both dry and processed signals through the same output path, or use your DAW's built-in latency compensation.
Routing Strategy for Hybrid Chains
The most transparent hybrid setup uses a send/return architecture: create an auxiliary channel that receives the master bus via send, routes it to analog hardware, and returns the processed signal on a dedicated input track. This lets you blend dry and processed signals, controlling how much analog character you introduce.
Mastering Headroom Requirements and Gain Staging Fundamentals
Headroom is the space between your loudest peak and maximum level before clipping. In digital systems, stay below 0 dBFS. In analog systems, gear can handle levels above nominal, it distorts, but whether that distortion is musical depends on the gear and how much you push it.
Digital Headroom: The Simple Rule
In a digital signal chain, your loudest peak must never exceed 0 dBFS. Target −3 to −6 dB before the final limiter, giving room for compression and EQ. The limiter catches peaks exceeding your target loudness (−0.3 dB for streaming, −0.1 dB for CD).
Digital clipping is catastrophic and irreversible: once a sample hits 0 dBFS, it's truncated with harsh, aliased distortion. A single clipped sample is audible on any decent playback system.
Analog Headroom: Nominal Levels and Saturation
Analog gear operates around a nominal level, typically +4 dBu. When you push an analog compressor or EQ past nominal, it enters saturation, gradual harmonic distortion that many engineers find musical and desirable.
You can run analog gear "hot," pushing peaks 3-6 dB above nominal, resulting in controlled saturation.
Practical Gain Staging Across a Hybrid Chain
Here's where the real skill lies: setting levels across multiple pieces of hardware and software so that each stage operates in its sweet spot without clipping or losing signal.
Metering Tools for Accurate Gain Staging
Use multiple meters to verify levels: VU meters show average level (peaks around 0 VU nominal); Peak meters show instantaneous peaks in dBFS to prevent clipping; Phase correlation meters show if channels are in phase (below +0.8 indicates issues); Loudness meters show integrated loudness in LUFS for streaming platforms.
The Interaction Between Analog Saturation and Digital Limiting
Hybrid mastering's power lies in the interaction between analog saturation and digital limiting. Pushing analog gear into saturation adds harmonic complexity and compresses peaks slightly; the digital limiter catches remaining peaks. This two-stage approach produces loud, punchy, musical masters because loudness comes from saturation and harmonic density, not just brick-wall limiting.
Choosing Your Signal Chain: Practical Considerations
The decision comes down to five practical factors: Budget (analog gear is expensive; digital plugins cost less); Genre (acoustic/jazz benefit from analog warmth; electronic/hip-hop from digital transparency); Workflow (high-volume work favors digital; single projects favor analog); Monitoring (analog translates better across varied playback systems); Technical comfort (analog requires gain staging knowledge; digital requires plugin/DAW knowledge).
Third, your workflow demands.
Fourth, your monitoring environment.
Fifth, your technical comfort.
Conclusion: Working With Professional Mastering Engineers
The analog vs digital signal chain debate often obscures a simpler truth: the engineer matters more than the equipment. A skilled mastering engineer with modest gear will outwork an inexperienced engineer with world-class hardware every time.
Frequently Asked Questions
What are the primary sonic differences between analog and digital mastering chains?
Analog signal chains introduce harmonic distortion and saturation through physical circuitry, creating what many describe as warmth or color. Digital chains prioritize transparency and precision, with zero coloration when properly gain-staged. Analog adds subtle harmonic complexity across the frequency spectrum; digital preserves exact waveform integrity. The choice depends on your genre and whether you want the signal chain itself to contribute to the final tone or remain sonically neutral.
Why do professional mastering engineers prefer analog outboard gear?
Analog outboard gear delivers authentic harmonic saturation and transient response that digital plugins emulate but cannot fully replicate at the component level. Hardware compressors and EQs respond dynamically to the signal in real time, offering musicality that purely digital processing struggles to match. Professional engineers value the signal integrity and sonic character that premium analog components provide, especially for critical listening and final loudness optimization on streaming and physical formats.
How does a hybrid mastering chain work?
A hybrid mastering workflow routes your digital mix through analog outboard gear via AD/DA conversion, then back into the DAW for final peak limiting and metering. You gain the sonic benefits of analog saturation and compression while retaining digital precision for loudness and transparency control. This approach combines analog warmth in the midstage with digital safety and recallability at the end, making it ideal for artists who want character without sacrificing commercial loudness standards.
What mastering headroom should I leave before sending tracks for professional mastering?
Leave at least 3-6 dB of headroom on your stereo mix bus to give the mastering engineer room to work with compression, EQ, and saturation without clipping. Your mix peak should sit around -6 to -3 dB, never peaking at 0 dB. This headroom allows the mastering engineer to apply gain staging and dynamic range processing without distortion, whether using analog outboard gear or digital plugins. Proper headroom is essential for both analog and digital signal chains to function transparently.