
 how-to
Mastering Podcast Episodes for High Fidelity Audio
Table of Contents
- What Is Podcast Mastering and Why It Matters
- Mixing vs. Mastering: Understanding the Critical Difference
- Podcast Loudness Standards and LUFS Requirements
- Essential Mastering Techniques for Podcast Audio
- Best Audio Mastering Software for Podcasts
- Podcast Audio Mixing Best Practices Before Mastering
- Mastering for Multiple Platforms and Formats
- The Mastering Process: What to Expect
- Frequently Asked Questions
Last Updated: September 30, 2026
What Is Podcast Mastering and Why It Matters
Mastering podcast episodes is the final step in audio production where a professional engineer optimizes your mix for clarity, consistency, and compatibility across all distribution platforms. It's not mixing, mixing balances individual tracks. Mastering takes that balanced stereo mix and prepares it for the real world: streaming services, mobile devices, car speakers, and everything in between.
A great mix sounds good in your studio. A mastered podcast sounds great everywhere.
Streaming platforms normalize audio differently, Spotify, Apple Podcasts, and YouTube each use their own loudness standards. Without proper mastering, your episode might sound quiet on one platform and distorted on another, causing listeners to skip ahead or switch shows.
Professional mastering also catches problems a mixing engineer might miss. Sibilance that hisses on earbuds. Plosives that pop on phone speakers. Frequency imbalances that tire the ear after 30 minutes. A mastering engineer with trained ears and treated acoustics identifies and fixes these issues before your episode goes live.
Mixing vs. Mastering: Understanding the Critical Difference
Mixing is about balance and depth. A mixing engineer takes multiple tracks, your voice, background music, sound effects, ads, and blends them into a single stereo file. They adjust levels so nothing overpowers anything else. They add effects like reverb or compression to individual tracks. They pan elements left and right. The goal is a cohesive, clear stereo mix.
Mastering takes that finished stereo mix and optimizes it for distribution. A mastering engineer doesn't touch individual tracks. They work on the stereo file as a whole. They shape the frequency spectrum so the mix translates across different playback systems. They control loudness to meet platform standards. They add limiting to prevent clipping. They ensure mono compatibility for older devices. The goal is a file that sounds professional everywhere it plays.
Mastering your own work immediately after mixing rarely works, your ears are fatigued, your room isn't treated, and you lack the specialized monitoring equipment. A fresh set of professional ears in a treated room catches what you miss.
Podcast Loudness Standards and LUFS Requirements
Loudness is measured in LUFS (Loudness Units relative to Full Scale), which accounts for how human ears perceive volume, not just raw signal strength.
Streaming platforms normalize audio to specific loudness targets (Loudness normalization on Spotify). Hitting these targets prevents the platform from introducing artifacts and distortion through automatic adjustment.
Target LUFS Levels for Streaming Platforms
Different platforms have different loudness standards. Here's what you need to know:
- Spotify: -14 LUFS (integrated loudness)
- Apple Podcasts: -16 LUFS (integrated loudness)
- YouTube: -13 LUFS (integrated loudness)
- Broadcast/Radio: -23 LUFS (integrated loudness)
Master to -16 LUFS to meet Apple's stricter standard and normalize predictably across all platforms.
Mastering too loud collapses dynamic range, creating listener fatigue that causes them to stop listening.
True Peak Limiting and Headroom
True peak measures inter-sample peaks that can exceed your waveform's visual maximum when converted for playback, unlike regular peak measurement.
True peak limiting prevents clipping when your file is converted to different formats or played on different devices. Most platforms require true peak to stay below -1 dBTP (decibels true peak). This gives you headroom, breathing room between your loudest moment and the point where distortion happens.
A professional mastering engineer sets true peak limiting at -1 dBTP and then shapes the mix to sit comfortably below that ceiling. This prevents the harsh, digital distortion that ruins podcast audio.
Essential Mastering Techniques for Podcast Audio
Professional mastering for podcasts involves several key techniques working together. None of them work in isolation, they're part of a chain that builds on itself.
Dynamic Range Compression and Gain Staging
Compression controls the dynamic range of your audio. It reduces the volume of loud parts while leaving quiet parts alone. For podcast voice, this creates consistency, no sudden jumps in loudness that startle listeners or fade out sections that disappear. Consistent gain staging relies on the integrity of your signal chain, which is why maintaining audio equipment remains a fundamental practice for ensuring that your compression settings translate accurately to the final master.
Gain staging sets the input level so the signal hits the compressor correctly, too quiet and compression does nothing; too loud and it becomes aggressive.
Gentle compression (2:1 or 3:1 ratio, 50-100ms attack, 200-400ms release) smooths peaks while preserving natural speech dynamics.
Excessive compression with fast attack times removes snap and presence from voice. Less is more.
EQ and De-Essing for Voice Clarity
Equalization (EQ) shapes the frequency spectrum. For podcast voice, the goal is clarity without harshness.
A typical voice-focused EQ curve:
- High-pass filter at 80Hz to remove rumble and low-frequency noise
- Gentle dip around 200-300Hz to reduce muddiness
- Slight boost around 2-4kHz for presence and clarity
- Careful management of 5-8kHz to avoid harshness
De-essing is specialized EQ that targets sibilance, the "s" and "sh" sounds that can hiss on headphones. A de-esser is essentially a compressor that only activates when it detects sibilant frequencies. It reduces those peaks without affecting the rest of the voice.
Professional mastering uses subtle EQ to enhance clarity, not reshape the voice.
Removing Sibilance and Plosives
Sibilance is the high-frequency hiss of "s" sounds. Plosives are the explosive bursts of "p" and "b" sounds. Both are common in close-miked podcast recordings.
Sibilance: A de-esser or multiband compression (5-8kHz range) tames peaks without eliminating "s" sounds.
Plosives: These are harder to fix in mastering since they're usually recording or mixing issues. Prevention through proper mic technique and pop filters is better than correction.
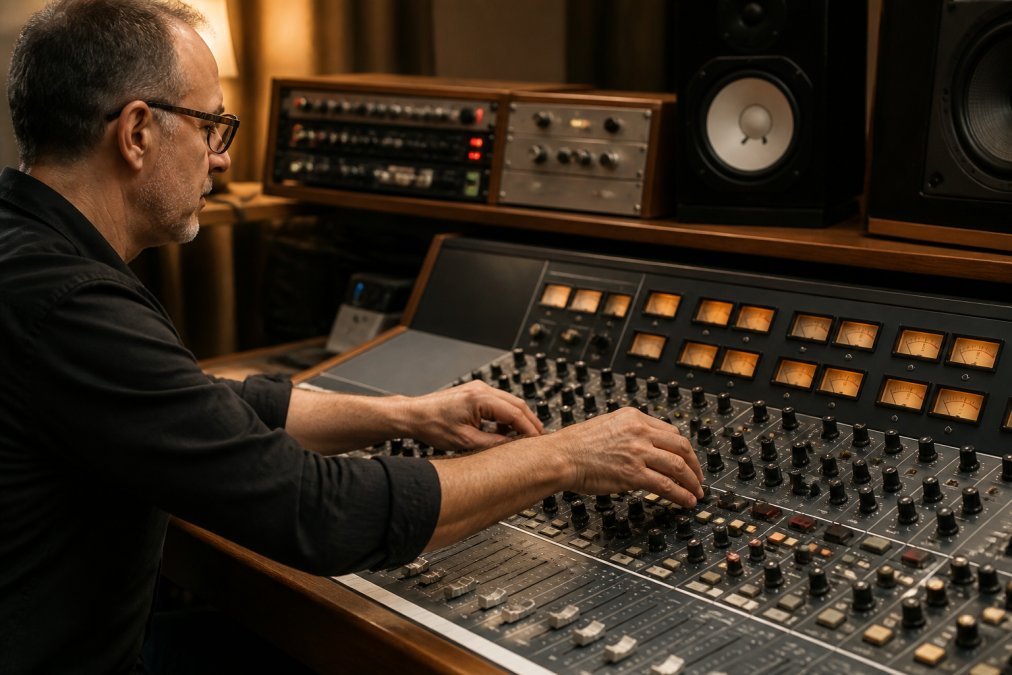
Best Audio Mastering Software for Podcasts
Professional mastering relies on the engineer's skill and studio acoustics more than software choice.
Software mastering can't replace acoustic environment and trained ears. A mastering engineer's experience in treated rooms with calibrated monitoring catches problems automation misses.
AI-assisted mastering applies generic presets to every podcast. Professional mastering adapts to your specific voice and content.
Podcast Audio Mixing Best Practices Before Mastering
What arrives at the mastering studio sets the ceiling for what's possible, which is why mastering podcast episodes requires great mixing as a foundation. Great mixing makes mastering easier. Poor mixing limits what a mastering engineer can do.
Setting Up Your Recording Environment
A treated room with acoustic panels, bass traps, and proper mic placement produces cleaner source material, reducing work downstream.
Key steps:
- Choose a quiet room: Avoid rooms with hard surfaces that reflect sound. Bedrooms with soft furnishings work better than tile bathrooms.
- Use a quality microphone: A decent condenser microphone ($200-500) beats a cheap USB mic. Condenser mics capture voice detail that mastering engineers need.
- Add a pop filter: Prevents plosives from overloading the microphone and creating distortion at the source.
- Position the microphone correctly: 6-8 inches from your mouth, slightly off-axis. This captures voice clearly while minimizing plosives and sibilance.
- Monitor your levels: Keep your recording level around -12dB to -6dB. This gives headroom and prevents clipping during recording.
Preparing Files and Export Settings
Before sending files to mastering, prepare them correctly.
Export as stereo WAV at 24-bit, 48kHz with 3-6dB headroom (loudest peak around -6dB).
Mastering for Multiple Platforms and Formats
Your podcast lives on multiple platforms, each with different requirements. Professional mastering prepares files for all of them.
Platform-Specific Loudness Normalization
Streaming platforms normalize audio to their loudness standard. This happens automatically. Your file arrives at -14 LUFS, Spotify normalizes it to their target, and listeners hear it at Spotify's loudness level.
Stem and Vinyl Mastering Workflows
Stem mastering means mastering individual elements separately, voice stem, music stem, effects stem, then combining them. This gives flexibility if you need to adjust individual elements later. It's common for podcasts that include music licensing or sound design.
The Mastering Process: What to Expect
Professional mastering follows a consistent process. Understanding it helps you prepare and know what's coming.
Frequently Asked Questions
What's the difference between mixing and mastering a podcast?
Mixing balances individual tracks, adjusts levels, and creates spatial depth. Mastering optimizes the final stereo mix for distribution across platforms, ensuring consistent loudness (LUFS), clarity, and translation across different playback systems. Mixing happens during production; mastering is the final professional step before release.
What LUFS level should my podcast be mastered to?
Most podcast platforms target -16 LUFS to -14 LUFS for loudness normalization. Spotify uses -14 LUFS, while Apple Podcasts and other platforms use -16 LUFS. Your mastering engineer will ensure your episodes meet these standards while maintaining dynamic range and preventing distortion through proper peak limiting and headroom management.
Can analog mastering equipment actually improve digital podcast audio?
Yes. Analog outboard gear like compressors, EQs, and limiters adds harmonic warmth and natural saturation that digital plugins often cannot replicate. The signal path through premium analog equipment can enhance sonic clarity, improve frequency spectrum balance, and reduce audio artifacts. The final output is converted back to digital for distribution, combining analog warmth with digital precision.
How do I prepare my podcast files for professional mastering?
Export your final stereo mix at 24-bit depth and 48 kHz sample rate (or higher) as WAV files. Leave at least -3dB of headroom to prevent clipping. Remove any limiting or mastering plugins from your master bus. Provide clear metadata, notes about your vision, and reference tracks if desired. Your mastering engineer will handle gain staging, compression, EQ, and loudness normalization from there.