 ultimate-guide
Mastering Equipment: Build a Pro Analog Chain
Table of Contents
- Mastering Equipment: What Actually Matters for a Release-Ready Sound
- The Mastering Signal Flow: How Your Track Moves Through the Chain
- Analog vs. Digital Mastering Gear: Where Each One Wins
- Core Analog Mastering Equipment: The Tools That Shape Your Sound
- Building Your Analog Mastering Chain on a Budget
- The First Purchase: Your Audio Interface's Conversion
- Your First Analog Processor: A Transparent Stereo Compressor
- The Budget Trap: Why One Good Unit Beats Three Cheap Ones
- The Hybrid Workflow: Integrating Hardware into Your DAW
- Maintenance and Calibration: The Hidden Cost of Analog
- A Realistic Budget Roadmap
- Converters, Monitoring, and Your Acoustic Environment
- When to Trust a Professional Mastering Studio
- Frequently Asked Questions
Last Updated: September 7, 2026
Mastering Equipment: What Actually Matters for a Release-Ready Sound
Most home studios invest heavily in microphones, preamps, and monitors, yet the final polish that separates a demo from a commercial release often comes down to mastering equipment. A dedicated mastering signal chain is the difference between a track that sounds loud and one that sounds finished.
Mastering equipment does not have to mean a six-figure investment. What matters is understanding how each component shapes your audio fidelity and where your current setup falls short.
The Mastering Signal Flow: How Your Track Moves Through the Chain
Mastering signal flow is the ordered path your audio takes from the final mix through processing to the mastered stereo file. A typical analog chain begins with a precision monitoring controller, moves through equalization, then compression, then limiting, with conversion happening at the start and end of the path (sweetwater.com).
The sequence matters more than most guides admit. EQ before compression means the compressor reacts to your corrected frequency balance rather than amplifying problem frequencies. A brickwall limiter sits last, catching peaks before conversion.
Gain staging is the quiet hero of this process. Every analog outboard unit adds harmonic distortion and noise, so keeping levels consistent prevents degradation. Most mastering engineers aim for unity gain through each insert, using output trim rather than pushing input levels.
Analog vs. Digital Mastering Gear: Where Each One Wins
The analog-versus-digital debate is less about superiority and more about what each does best. Analog excels at adding musical harmonic distortion, glue, and weight. Digital wins on precision, recall, and transparency, particularly for surgical EQ cuts and loudness normalization.
Many engineers run hybrid setups, using analog for tone shaping and digital for metering and final limiting, giving you analog character with digital repeatability.
| Approach | Strengths | Weaknesses | Best For |
|---|---|---|---|
| Analog hardware | Musical saturation, width, depth | Cost, maintenance, no recall | Rock, jazz, vinyl, hip-hop |
| Digital plugins | Precision, recall, affordability | Can sound sterile if overused | Pop, EDM, streaming-first releases |
| Hybrid chain | Tonal character plus accuracy | Complex signal path, latency | Most commercial releases |
Core Analog Mastering Equipment: The Tools That Shape Your Sound
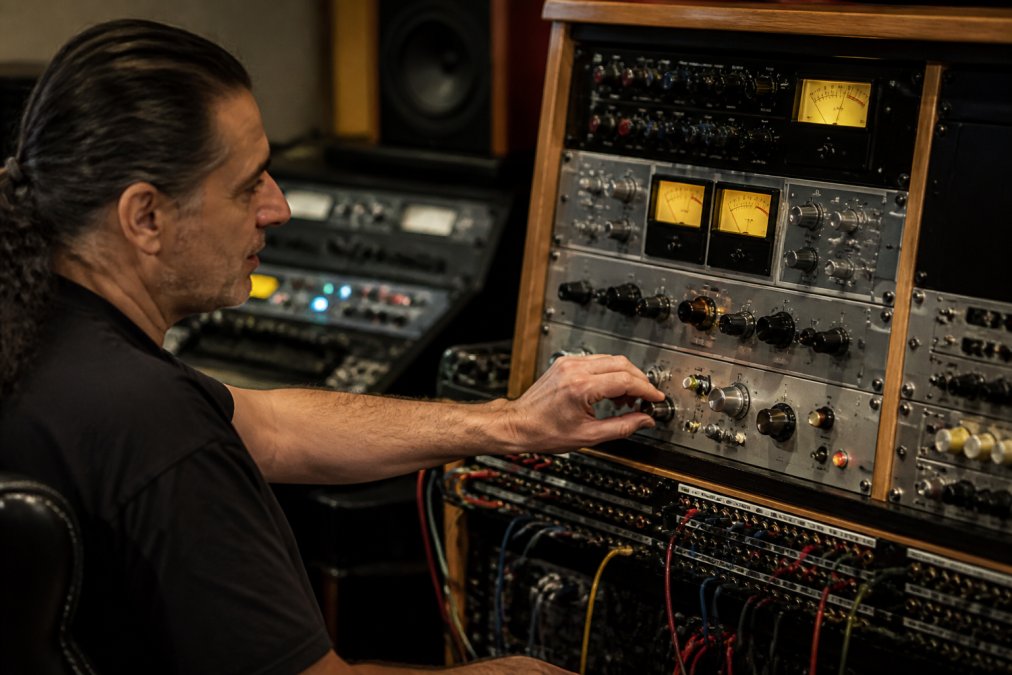
Analog mastering equipment falls into a few essential categories. A mastering-grade equalizer shapes frequency balance, a compressor controls dynamics, and a limiter catches peaks. High-quality AD/DA converters determine how faithfully your analog processing translates back to digital.
The quality of your conversion cannot be overstated. Every pass through a converter introduces coloration, so premium converters with stable clocking preserve the detail your mix captured. Bit depth and sample rate matter less than analog stages and clock accuracy.
The order of processing and the quality of your monitoring chain matter as much as the specific units. A $3,000 equalizer is wasted if your room and monitors cannot reveal what it is doing.
Mastering Compressors and Dynamics
A mastering compressor is a stereo unit designed for subtle gain reduction, typically 1-3 dB, to glue the mix together (soundonsound.com). Look for variable knee behavior, sidechain filtering, and stereo-linked mode to preserve your stereo width.
The best mastering compressors offer transparent operation when needed and musical coloration when pushed. Opto and vari-mu designs are slower and more forgiving, while VCA compressors provide faster transient control.
Equalization (EQ) for Mastering
Mastering EQ demands precision. A parametric EQ with Q adjustments, shelving filters, and minimal phase shift lets you correct frequency balance issues without artifacts. Unlike mixing EQ, mastering EQ often involves cuts of a fraction of a decibel.
Linear-phase EQ preserves transient response but can introduce pre-ringing on percussive material. Minimum-phase designs sound more natural but shift phase relationships slightly.
Building Your Analog Mastering Chain on a Budget
A functional, release-ready analog chain can be assembled incrementally. The key is to avoid buying many cheap, characterless units and instead focus on a few high-impact, transparent tools that will serve you for years.
The First Purchase: Your Audio Interface's Conversion
Before you buy any outboard gear, your audio interface's AD/DA converters are the single most important piece of mastering equipment you own. A budget interface with jittery clocking will smear transients and add a brittle high end, negating the benefits of any expensive gear you connect to it.
Look for interfaces with dedicated, high-quality converter chips, stable internal clocking, and transparent analog I/O. If you are serious about mastering, consider a dedicated 2-channel AD/DA converter, such as those from Mytek Digital or Crane Song, added later via ADAT or AES/EBU. This single upgrade will improve your audio fidelity more than any processor.
Your First Analog Processor: A Transparent Stereo Compressor
Once your conversion is solid, the first outboard processor to add is a stereo compressor. This is the workhorse of the mastering chain, providing the 'glue' that holds a mix together. A mastering-grade unit should offer:
- Stereo linking: True stereo operation to maintain the spatial image.
- Sidechain high-pass filter: To prevent the compressor from pumping on low-frequency energy.
- Variable knee and ratio: For transparent gain reduction (1-2 dB) or more aggressive musical pumping.
- Makeup gain with a clean output stage: To maintain unity gain without adding noise.
For a budget-conscious setup, look at the used market for classic VCA or opto designs from reputable manufacturers. Start with a single compressor and learn its behavior intimately before adding more gear.
The Budget Trap: Why One Good Unit Beats Three Cheap Ones
The biggest mistake budget builders make is buying multiple cheap analog units instead of one quality piece. A $200 compressor from an unknown brand will likely add noise, have poor stereo tracking, and offer limited control. Start with high-quality linear-phase plugins for surgical cuts and save your hardware budget for a character piece like a Pultec-style EQ or a vari-mu compressor.
The Hybrid Workflow: Integrating Hardware into Your DAW
A modern mastering chain is almost always hybrid, blending analog character with digital precision. The challenge is integrating hardware inserts without latency or phase issues. Instead of inserting hardware directly on your master bus, create a dedicated aux track. Send your mix to a hardware output, route the return to a new audio track, and record the processed signal.
This 'print and compare' method is superior: you avoid live round-trip latency, you can easily A/B the processed version against your original mix, and you can re-run analog processing with different settings without re-processing the entire mix.
Maintenance and Calibration: The Hidden Cost of Analog
Analog gear is not a set-and-forget purchase. Capacitors age, potentiometers get scratchy, and calibration can shift, especially in vintage units. When buying used, always budget for professional servicing. Keep your gear in a clean, dust-free environment with stable temperature and humidity.
A Realistic Budget Roadmap
A realistic, incremental path for a home studio owner: upgrade your interface to one with high-quality conversion; purchase a single, high-quality used stereo compressor; add a dedicated mastering EQ with a musical high-frequency shelf and low-end filter; then add a dedicated AD/DA converter to maximize fidelity.
This approach prioritizes the tools that have the most significant impact on your final sound and avoids buying gear you will quickly outgrow. The goal is not a full rack, but a few pieces you trust completely.
Converters, Monitoring, and Your Acoustic Environment
Your mastering chain is only as good as your ability to hear it. An untreated room with inaccurate low-frequency response will lead you to make EQ decisions that sound wrong everywhere else.
The Monitoring Chain: Speakers, Amplifiers, and Controllers
Your monitoring chain is a signal path in itself, and every component matters. A single high-quality pair of nearfield monitors, properly positioned, outperforms multiple pairs in a poorly treated room.
- Monitor Selection: For mastering, look for monitors with a flat frequency response, low distortion, and excellent transient response. You want 'truthful' speakers, not 'flattering' ones. Popular choices include monitors with a flat frequency response, low distortion, and excellent transient response.
- Amplification: If you choose passive monitors, the amplifier is just as important as the speakers. Look for a high-quality, low-noise amp with plenty of headroom, a high damping factor, and a flat frequency response.
- Monitoring Controller: A mastering-grade controller should offer multiple speaker outputs for A/B comparisons, accurate volume control with precise step attenuation, and instant mono compatibility checking. A good controller ensures volume changes do not introduce coloration.
Acoustic Treatment: The First Reflection Points and Bass Traps
The room is the most significant source of coloration in your monitoring chain. The goal of acoustic treatment is to control reflections and resonances so that what you hear is the speaker, not the room.
- First Reflection Points: Early reflections from the side walls, ceiling, and floor cause comb filtering, which smears the stereo image and muddies the frequency response. Place broadband absorption panels (at least 2-4 inches thick) at these points.
- Bass Traps: Low-frequency energy builds up in corners, causing modal ringing and uneven bass response. Install bass traps in the corners. This is the most critical treatment for mastering, as it directly affects your ability to judge low-end balance.
- Behind the Monitors: A large absorption panel or diffusion element behind the monitors prevents front-wall reflections from interfering with the direct sound.
Calibration and Reference Levels
Once your room is treated, calibrate your monitoring level. The industry-standard reference for film and video is 85 dB SPL (C-weighted) per channel, but for music mastering, a lower level is often preferred to reduce ear fatigue (itu.int). A common practice is to calibrate monitors so a -20 dBFS pink noise signal produces 80 dB SPL (C-weighted) at your listening position. Use an SPL meter to set this level.
The Role of Headphones
Reference headphones are a secondary check, not a primary decision tool. They are invaluable for checking low-end detail in an untreated room, evaluating reverb tails, and checking for phase issues. High-end open-back headphones are excellent, but they should confirm decisions, not make them.
The Cost-Effective Upgrade
Precision monitoring is the most cost-effective upgrade most home studios can make, yet it is the most commonly ignored. An investment in acoustic treatment and a monitor controller will yield a more significant improvement in mastering quality than an equalizer.
When to Trust a Professional Mastering Studio
There comes a point where your equipment, room, and experience hit a ceiling, and that is when a professional mastering studio earns its value. A dedicated facility with a properly treated acoustic environment, premium analog outboard gear, and an experienced engineer will extract more from your mix than additional home equipment purchases.
After weeks of mixing, your ears are fatigued and biased toward your creative decisions. An engineer hearing your track fresh, on accurate monitoring in a calibrated room, catches issues you have stopped noticing. This is particularly true for vinyl mastering, which requires specialized knowledge of physical groove constraints.
The LB-Mastering Studios facility is led by a Latin GRAMMY Award-winning and 11x Billboard-charting engineer with over 44 years of professional experience. Our specialized environment features premium analog outboard gear for CD, stem, and vinyl mastering, ensuring your music reaches its full potential. We offer a free sample master so you can hear the difference before committing.
Building a release-ready mastering chain comes down to understanding signal flow, prioritizing monitoring and conversion, and knowing when your setup has reached its limits. The right mastering equipment, whether a single quality compressor or a full analog rack, should serve the music rather than complicate it. For independent artists and labels who want world-class analog mastering without the capital investment in gear, LB-Mastering Studios offers expert mixing and mastering services backed by decades of industry experience. Book a session to hear what a professional analog chain can do for your next release.
Frequently Asked Questions
What tools are used in mastering?
Mastering engineers use a focused set of tools: high-quality equalizers to shape frequency balance, compressors to control dynamics, and limiters to maximize loudness safely. The signal path also includes precision AD/DA converters to move audio between analog and digital domains. A mastering-grade monitoring system and a treated acoustic environment are essential for hearing the true result. The exact mastering equipment varies by engineer, but this core chain remains the standard for professional results.
What is the difference between analog and digital mastering equipment?
Analog mastering gear processes the audio signal using continuous electrical circuits, often adding subtle harmonic distortion and a cohesive quality that many engineers find musical. Digital mastering equipment works in the software domain, offering precise recall, surgical edits, and transparent processing. Analog gear is prized for its tone and character, while digital excels at precision and flexibility. A hybrid approach, using both, is a common professional workflow.
Do I need hardware for professional-grade mastering?
No, you can achieve professional results with high-quality plugins in a DAW. However, many engineers find that dedicated hardware, like an analog mastering chain, provides a different workflow and a certain sonic glue. Hardware requires a significant investment in both gear and acoustic treatment. For most independent artists, a skilled engineer using a well-equipped studio is more reliable than attempting to build a professional chain from scratch.
Why is mastering considered the most difficult stage of production?
Mastering is difficult because it requires a fresh perspective on a finished mix, a highly tuned listening environment, and years of experience making critical decisions. The changes are subtle, yet they must translate across every playback system. Engineers need to balance artistic intent with technical standards for loudness and format specifications. A mastering signal flow that works for one track may fail for another, demanding constant critical judgment.
How do I know if my mix is ready for a professional mastering chain?
Your mix is ready when it sounds balanced, dynamic, and clear on your own monitoring system. You should be able to hear every element clearly without distortion. If your mix has obvious frequency imbalances, clipping, or uncontrolled dynamics, these issues are often better fixed in the mix stage. A mastering engineer can make final adjustments, but they cannot clean up a poorly mixed track. When you are unsure, a free sample master can reveal how your mix responds to professional mastering equipment.