 ultimate-guide
How to Prepare Podcast Audio for Vinyl Pressing
Table of Contents
- Why Podcast-to-Vinyl Conversion Requires Different Mastering Techniques
- Understanding Vinyl Mastering Requirements for Spoken Word
- Dynamic Range Management for Vinyl
- Vinyl Cutting Frequency Limitations and Audio Artifacts
- Audio File Preparation for Lacquer Cutting
- Troubleshooting Home-Recorded Podcast Audio for Vinyl
- The Role of Test Pressings and Quality Control
- Preparing for Professional Vinyl Mastering
- Frequently Asked Questions
Last Updated: September 1, 2026
Why Podcast-to-Vinyl Conversion Requires Different Mastering Techniques
Converting podcast audio to vinyl pressing is fundamentally different from mastering music for the same format. At LB-Mastering Studios, we've worked with independent podcasters who discovered this the hard way, they sent a standard stereo mix to a pressing plant and received test pressings with distorted dialogue, crushed dynamics, and unlistenable high-frequency content.
Vinyl mastering for music prioritizes frequency response, dynamic range, and stereo imaging. Podcast mastering must protect intelligibility above all else. Speech contains concentrated midrange energy and sibilants in the high frequencies. Those harsh "s" and "t" sounds cause tracking issues on vinyl if left uncontrolled. Meanwhile, a podcast might have a 12 dB dynamic swing between a whispered aside and an emphatic statement, music mastering compresses that to 6-8 dB. On vinyl, that uncontrolled dynamic range becomes a physical problem: the cutting lathe can't track properly, and the groove becomes unstable. Most podcast creators treat vinyl mastering like a checkbox, applying the same chain used for streaming, only to receive a physical product that sounds worse than the digital version.
Understanding Vinyl Mastering Requirements for Spoken Word
Vinyl mastering for spoken word demands a completely different approach than music mastering. The physical constraints of the medium collide with the characteristics of human speech in ways that require specific technical solutions.
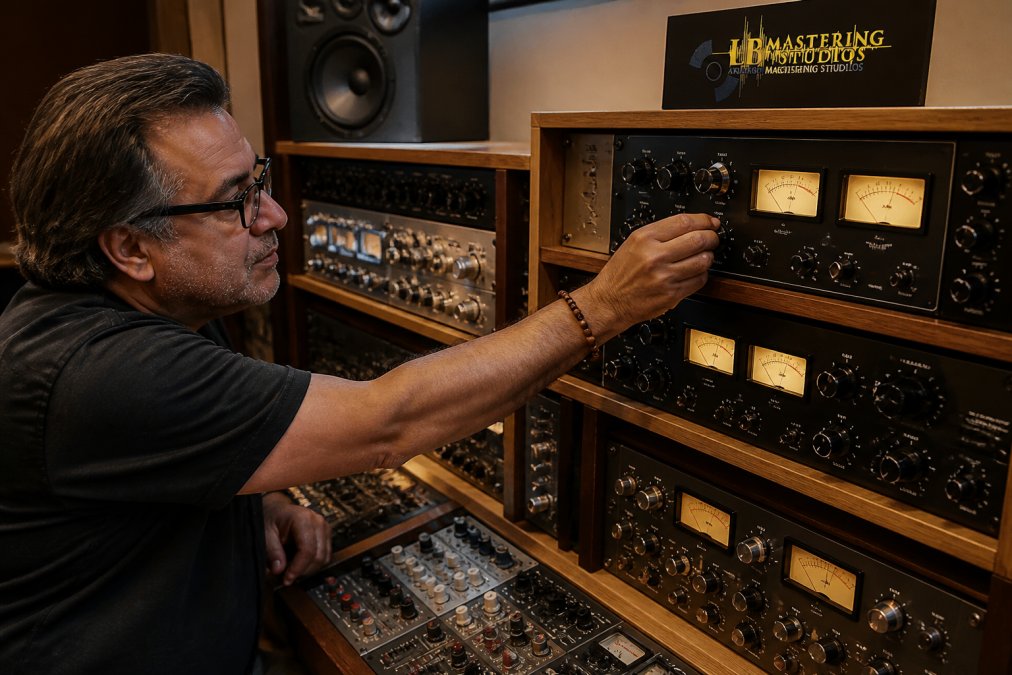
When you cut audio to lacquer, the cutting stylus traces a groove into the disc. That groove's width and depth are determined by the signal's amplitude and frequency content. The vinyl cutting process imposes hard limits on what the groove can physically accommodate. The cutting head can only move so far left and right (lateral modulation) and up and down (vertical modulation) before it reaches mechanical limits. Exceed those limits, and the stylus either skips the groove or cuts into the adjacent spiral, creating distortion that cannot be fixed during pressing.
For spoken word, your mastering chain must accomplish three simultaneous goals: maintain intelligibility, prevent physical tracking issues, and preserve the natural character of the voice.
Managing Sibilance and High-Frequency Content
Sibilance is the enemy of vinyl mastering for podcasts. Those sharp "s" sounds create high-amplitude, narrow-bandwidth peaks in the frequency spectrum, exactly the kind of energy that causes the cutting stylus to jump or cut unstable grooves.
A de-esser is foundational. Unlike music mastering, where a de-esser is subtle, vinyl podcast mastering requires a broadband de-esser on the master bus itself. Set your de-esser to target the 4-8 kHz range, where most sibilant energy lives. Attack time should be fast (10-20 milliseconds) to catch the transient before it peaks. Release time around 100-150 milliseconds prevents pumping. Aim for 3-6 dB of gain reduction on sibilant peaks, not aggressive ducking.
After de-essing, apply a high-pass filter set to 80-100 Hz. Podcast audio rarely contains meaningful information below 100 Hz. Removing it eliminates low-frequency rumble and handling noise that consumes groove space and causes tracking issues.
Phase Correlation and Mono Compatibility
Vinyl is an inherently mono-compatible medium. If your left and right channels are out of phase, the cutting lathe will struggle to create a stable groove. Check your phase correlation before mastering using a phase correlation meter. For spoken word, your stereo image should be minimal anyway, dialogue typically sits in mono or near-mono.
A practical test: collapse your stereo mix to mono and listen critically. If the mono version sounds significantly different, thinner, or duller, you have phase problems. Ensure all vocal tracks are panned to center, and any stereo elements are properly phase-coherent.
For vinyl pressing, many mastering engineers recommend a stereo-to-mono conversion for the final 100 Hz and below. Use a crossover filter to split your audio at 100 Hz, convert the low end to mono, and recombine with the stereo high end.
Dynamic Range Management for Vinyl
Dynamic range is where podcast mastering diverges most sharply from music mastering. A typical music master targets -14 LUFS for streaming with aggressive compression. Podcast audio needs something different. The dynamic range of speech on vinyl must be controlled but not crushed. Collapse that range too aggressively, and the voice sounds fatiguing and artificial.
Setting Peak Levels and RMS Targets
For vinyl podcast mastering, target peak levels at -3 to -1 dBFS. This provides headroom for inter-sample peaks and brief transients. RMS levels should sit around -18 to -16 dBFS for the bulk of your content. This is significantly quieter than music mastering, but appropriate for speech. Measure your RMS across a full episode (at least 10-15 minutes) to represent the average across variations.
Avoiding Brickwall Limiters and Overcompression
Do not use a brickwall limiter on the master bus of a podcast master destined for vinyl. When the limiter engages, it creates a sudden, audible change in the signal's behavior that becomes fatiguing when repeated dozens of times across an episode.
Instead, use a soft-knee compressor with a gentle ratio (2:1 to 4:1) and a high threshold. Set the threshold so the compressor engages only on the loudest peaks, perhaps the top 3-5 dB of your dynamic range. Use a slow attack time (50-100 milliseconds) to allow transients through, and a medium release time (300-500 milliseconds) to avoid pumping. The goal is transparent gain reduction, the listener shouldn't notice the compressor working at all.
Vinyl Cutting Frequency Limitations and Audio Artifacts
Vinyl has hard physical limits on the frequencies it can reproduce. The practical frequency range for vinyl is roughly 20 Hz to 20 kHz, but below 40 Hz and above 15 kHz, the cutting lathe struggles. Below 40 Hz, the groove becomes so wide that it consumes excessive space. Above 15 kHz, the groove becomes so narrow that it's prone to tracking distortion during playback.
Inner Groove Distortion and Side Length Constraints
Inner groove distortion (IGD) occurs in the final minutes of a vinyl side, near the center of the record. As the cutting stylus spirals inward, the groove radius decreases and tracking distortion increases, especially for high frequencies. professional audio quality.
A typical 12-inch vinyl record holds about 20-25 minutes of audio per side at standard cutting speeds. Most pressing plants recommend a maximum side length of 22 minutes for optimal sound quality. For podcast episodes longer than 22 minutes, plan for two-sided pressing or consider a 10-inch format (which holds 12-15 minutes per side).
Standard cutting speed is 33⅓ RPM. Some pressing plants offer slower speeds to fit more audio, but this reduces high-frequency response and increases surface noise. For spoken word, 33⅓ RPM is the better choice.
Audio File Preparation for Lacquer Cutting
The technical specifications of your audio file directly impact the quality of the lacquer cutting and ultimately the pressed vinyl.
Sample Rate, Bit Depth, and WAV Export Standards
Export your final master as a WAV file at 44.1 kHz sample rate and 24-bit depth. This is the standard for vinyl mastering. Do not export at 16-bit, the extra resolution of 24-bit is crucial during the cutting process. Use PCM (uncompressed) WAV format only. Do not use MP3, AAC, FLAC, or any compressed format.
Normalize your file to -0.1 dBFS peak. This ensures you're using the full bit depth without risking clipping.
Track Sequencing and Physical Layout for Spoken Word
Plan your side breaks strategically. If an episode has natural chapter breaks or segment transitions, place the side break there. For a single-episode pressing, aim for roughly equal playing time on each side, within 1-2 minutes of each other. Include a brief moment of silence (1-2 seconds) at the end of each side to signal completion.
Label your files clearly. If you're pressing a two-sided episode, name your files "Side A" and "Side B" or "Part 1" and "Part 2." Include timecode in the filename if possible. This prevents confusion during the cutting process.
Troubleshooting Home-Recorded Podcast Audio for Vinyl
Most podcasters record at home, which introduces challenges: inconsistent room acoustics, background noise, variable microphone technique, and uncontrolled dynamics. Understanding what's fixable and what isn't is crucial before committing to vinyl pressing.
Addressing Noise Floor and Signal-to-Noise Ratio Issues
Home recordings often have an audible noise floor. On vinyl, this becomes a problem, the groove must accommodate every frequency in your signal, including noise. Measure your noise floor by recording 30 seconds of silence and analyzing the frequency spectrum (aes.org).
If hum is present, use a notch filter to remove it. A narrow, high-Q notch filter at 60 Hz (and possibly 120 Hz and 180 Hz) can eliminate electrical hum without affecting dialogue. For broadband hiss, a high-pass filter at 80-100 Hz removes subsonic and low-frequency rumble. Noise reduction tools can help, but use them sparingly, aggressive noise reduction introduces artifacts.
Correcting Frequency Response Problems
Home recording setups often have uneven frequency response. Use a gentle parametric EQ to correct obvious problems. Start by identifying the problem frequency with a narrow Q setting, then widen the Q slightly and apply gentle correction, aim for 2-4 dB of gain reduction or boost, not 10+ dB.
Common corrections for home-recorded podcasts include presence peak reduction around 3-5 kHz, high-pass filtering for boomy low end below 200 Hz, and gentle boosts at 200-300 Hz for warmth.
The Role of Test Pressings and Quality Control
Before committing to a full production run, always order test pressings. A test pressing is a small batch (usually 5-10 copies) of your vinyl, cut from the same lacquer and pressed using the same process as the full run. It's your final quality control checkpoint.
When you receive test pressings, listen critically on a quality turntable for tracking distortion (especially in the final minutes of each side), sibilance harshness, dropout or skipping in quiet passages, uneven volume between sides, and surface noise. If you hear significant issues, contact the pressing plant immediately. They can often re-cut the lacquer and produce new test pressings.
Preparing for Professional Vinyl Mastering
After you've prepared your audio file and addressed technical issues, the final step is professional mastering. A professional mastering engineer brings specialized knowledge and equipment that home setups cannot match. Professional mastering for vinyl requires understanding the physical constraints of the cutting lathe, the pressing process, and how different frequencies and dynamics behave in the groove.
When you send your podcast master to a professional mastering studio, provide detailed notes about your content, goals, and any specific concerns. Include information about your recording setup, the microphone you used, and any processing you've already applied.
LB-Mastering Studios specializes in customized mastering for CD, stem, and vinyl formats. Our team understands the unique challenges of podcast-to-vinyl conversion and applies techniques specifically designed for spoken word. We handle the technical details, phase correlation, dynamic range optimization, frequency management, so your podcast sounds its best on vinyl. Book a session to discuss your project and receive a free sample master that demonstrates how professional vinyl mastering can transform your podcast into a physical product that sounds exceptional.
Frequently Asked Questions
Q: What file format should I use when preparing podcast audio for vinyl pressing?
A: Export your mastered podcast audio as a WAV file at 44.1 kHz sample rate and 24-bit depth. This is the standard for vinyl mastering. Some facilities accept 48 kHz files, but 44.1 kHz ensures compatibility with most pressing plants. Avoid MP3 or compressed formats, as they degrade audio fidelity and introduce artifacts that become obvious during lacquer cutting. Confirm your specific pressing plant's requirements before final export.
Q: How does dynamic range management for vinyl differ from streaming mastering?
A: Vinyl requires more headroom and less aggressive compression than streaming formats. While streaming masters often use brickwall limiters to maximize loudness, vinyl mastering maintains natural dynamic range to prevent groove distortion and inner groove distortion. Peak levels should stay below -3dB to -1dB on the master bus, and RMS levels typically sit between -18dB and -16dB. This restraint preserves audio fidelity and ensures the mastering engineer can create a clean cut for lacquer.
Q: Do podcasts require different mastering techniques than music for vinyl?
A: Yes. Podcast audio for vinyl requires special attention to sibilance control, since spoken consonants (particularly 's' and 'sh' sounds) can cause tracking issues during playback. High-pass filters are essential to remove frequencies below 80-100 Hz that don't contribute to speech clarity. Phase correlation becomes critical with mono-compatible mixes to prevent stereo image collapse. Additionally, side length limitations mean you must sequence episodes carefully to fit the vinyl format without sacrificing audio quality.
Q: What is the maximum recommended duration per side for a 12-inch vinyl record?
A: A standard 12-inch vinyl record can hold approximately 20-25 minutes per side at 33⅓ RPM with good audio quality. Pushing past this can increase the risk of inner groove distortion, especially in the final grooves nearest the label. For podcast content, aiming for a duration that allows for optimal sound quality throughout the side is recommended. Longer episodes should be split across multiple records or edited for vinyl release.
This article was written using GrandRanker