 ultimate-guide
How to Prepare Audio Files for Professional Mastering
Table of Contents
- What to Do Before You Export Your Audio Files for Mastering
- Headroom for Mastering: How Much to Leave and Why It Matters
- Best File Format for Mastering: WAV, AIFF, Bit Depth, and Sample Rate
- Reference Tracks for Mastering: How to Choose and Use Them
- Handling Automation, Plugin Latency, and Stem Mastering Preparation
- File Naming, Organization, and Metadata (Including ISRC Codes)
- Troubleshooting Common Export Errors Before You Send Your Mix
- Communicating with Your Mastering Engineer
- Frequently Asked Questions
Last Updated: August 30, 2026
Knowing how to prepare audio files for professional mastering is the difference between a master that elevates your music and one that exposes every flaw in your mix. At LB-Mastering Studios, we've guided artists through this process, and the same avoidable mistakes show up repeatedly. Below, we'll walk through exactly what your mastering engineer needs from you, why headroom and file format choices matter, and how to handle the technical details most guides skip entirely.
The core principle is simple: your job is to deliver the cleanest, most dynamic mix possible. Your mastering engineer's job is to take it the rest of the way.
What to Do Before You Export Your Audio Files for Mastering
Before you render anything, your session needs a thorough audit. Skipping this step is the most common reason mixes come back for revision.
Remove or Bypass Your Master Bus Limiter and Heavy Compression
The biggest mistake most producers make is leaving a limiter or heavy bus compression on the master fader when they export for mastering. A mastering engineer working with a limited mix has almost no dynamic range left to work with. Bypass or remove every limiter, hard clipper, and aggressive compressor on your master bus before you export. Gentle bus glue compression adding 1-2 dB of gain reduction is generally fine to leave in place, but anything working hard to push loudness should come off.
Check for Clipping, Digital Distortion, and Inter-Sample Peaks
Digital distortion and clipping are not always obvious on playback, but they are immediately visible to a mastering engineer. Before export, zoom into your waveform in your DAW and check for any flattened peaks that indicate hard clipping.
Inter-sample peaks are a separate and often overlooked problem. A signal can measure below 0 dBFS on a sample-by-sample basis but still cause clipping during digital-to-analog conversion in streaming decoders. Use true peak metering, most professional DAWs include it, and aim to keep your true peak level no higher than -1 dBFS before sending your mix for mastering. According to AES (Audio Engineering Society) technical guidelines on inter-sample peaks, inter-sample peaks above 0 dBFS are a leading cause of distortion artifacts on streaming platforms.
Headroom for Mastering: How Much to Leave and Why It Matters
Headroom for mastering refers to the space between your mix's loudest peak and 0 dBFS, the digital ceiling. Providing adequate headroom gives the mastering engineer room to apply EQ, compression, limiting, and analog processing without distortion.
The practical target for most mixes is a peak level between -6 dBFS and -3 dBFS. The goal is ensuring the signal is not already riding close to the ceiling.
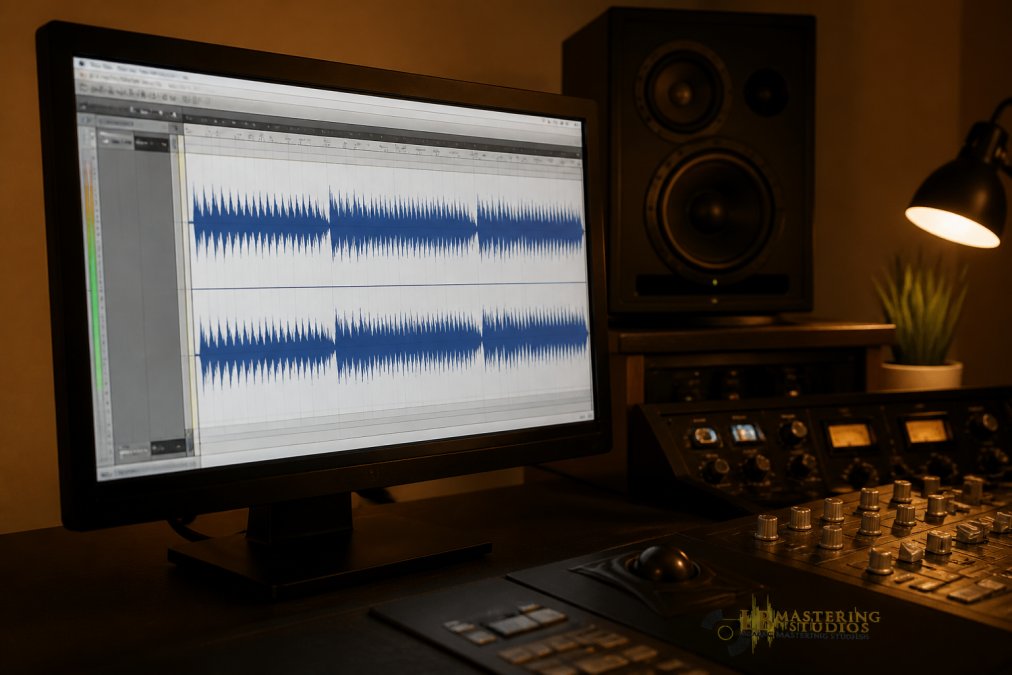
LUFS values are a separate consideration from peak headroom. Streaming platforms normalize playback to target integrated LUFS levels, which means delivering an artificially loud mix does not make it sound louder on Spotify or Apple Music. It just reduces the dynamic range available for mastering. Deliver a mix with natural dynamics and appropriate headroom, and let the mastering stage handle loudness optimization.
Best File Format for Mastering: WAV, AIFF, Bit Depth, and Sample Rate
The best file format for mastering is an uncompressed audio file: WAV or AIFF. Never send an MP3, AAC, or any other lossy format for mastering. Lossy compression introduces artifacts that compound during mastering processing and cannot be removed.
Between WAV and AIFF, the choice is largely a matter of platform preference. WAV is the more universally compatible format and the safe default for most workflows.
Bit Depth: 24-Bit vs. 32-Bit Float
Export at the bit depth your session is running. If you are working in a 24-bit session, export 24-bit WAV. If your DAW operates at 32-bit float internally, you can export 32-bit float WAV, which preserves the full internal precision of your session and gives the mastering engineer maximum headroom to work with.
Do not dither when exporting for mastering. Dithering is a noise-shaping process applied when reducing bit depth, typically from 24-bit to 16-bit for CD delivery. That step happens at the mastering stage, not during your mix export.
Sample Rate: What to Export At
Export at the native sample rate of your session. If you recorded and mixed at 48 kHz, export at 48 kHz. If you worked at 96 kHz, export at 96 kHz. Do not convert the sample rate before sending. Sample rate conversion introduces subtle artifacts and adds an unnecessary processing step. The mastering engineer will handle any sample rate conversion required for the final delivery format. As noted in Recording Academy's technical guidelines for audio delivery, maintaining the native sample rate through the mastering chain preserves the maximum audio integrity of the original recording.
Reference Tracks for Mastering: How to Choose and Use Them
Reference tracks for mastering are commercially released songs that represent the sonic target you want your master to approximate. They are not a blueprint to copy but a communication tool that helps your mastering engineer understand your intent.
Choose reference tracks that share genre, instrumentation, and energy level with your music. Three to five well-chosen references are more useful than a single track. Send the reference tracks as separate files alongside your mix, clearly labeled. Note specific qualities you want to match: the low-end weight, the high-frequency air, the overall loudness level, or the stereo width. The more specific you are, the more accurately the engineer can target your vision.
Handling Automation, Plugin Latency, and Stem Mastering Preparation
Plugin latency occurs when a plugin introduces a processing delay that your DAW compensates for during playback via PDC (Plugin Delay Compensation). On export or render, some DAWs handle PDC correctly; others do not, particularly on aux sends, sidechain routing, or parallel processing chains. The result is phase cancellation or timing artifacts that are not audible during playback but appear in the exported file.
After rendering, import your exported file back into your DAW session and align it against the original timeline. If there is any offset, your PDC is not rendering correctly. Adjust your export settings or consolidate tracks before rendering.
Automation that rides near 0 dBFS is another source of hidden clipping. Print your automation to audio and inspect the resulting waveform before export.
Preparing Stems for Stem Mastering
Stem mastering gives a mastering engineer more control than a stereo mix while requiring less session access than full mix mastering. Stems are grouped submixes: drums, bass, instruments, and vocals are the most common groupings.
When preparing stems:
- Export each stem from the same session state, with the same master bus processing (minus any limiting you have bypassed).
- Ensure all stems are the same length, starting from bar one or the same reference point in your session.
- Sum all stems together in your DAW and verify the result matches your stereo mix exactly.
- Label each stem clearly:
Artist_TrackTitle_Drums_24bit_48k.wav, for example.
Phase coherence between stems is critical. If the summed stems do not match the stereo mix, the mastering engineer cannot trust the individual stem levels.
File Naming, Organization, and Metadata (Including ISRC Codes)
Clear, consistent file naming prevents confusion and reduces back-and-forth communication. Use this structure:
ArtistName_TrackTitle_Version_BitDepth_SampleRate.wav
For example: JohnSmith_BlueSky_MixV3_24bit_48k.wav
Include the version number if you are sending multiple revisions. Label alternate mixes clearly: _Instrumental, _RadioEdit, _CleanVersion.
Metadata and ISRC codes are often overlooked until after mastering is complete. An ISRC (International Standard Recording Code) is a unique identifier assigned to each individual recording. It is required for commercial distribution on streaming platforms and for royalty tracking through performance rights organizations.
Obtain your ISRC codes from your distributor or from the ISRC registration authority for US recordings before your mastering session, and include them in your project notes when you submit your files. Additional metadata to prepare in advance: track titles, artist name, album title, release year, and genre.
Information to Prepare | Why It Matters | When to Provide |
|---|---|---|
ISRC codes | Required for streaming royalty tracking | Before mastering session |
Track titles and order | Ensures correct sequencing in masters | With file submission |
Artist and album name | Embedded in file metadata | With file submission |
Reference tracks | Communicates sonic target | With file submission |
Alternate mix versions | Prevents confusion between files | Labeled in filename |
Troubleshooting Common Export Errors Before You Send Your Mix
Export errors often go undetected until a mastering engineer flags them. Catching them yourself before submission saves time and avoids delays.
The mix sounds different from your session playback. This usually traces back to PDC issues, sample rate mismatch during export, or a plugin that is not rendering correctly in offline bounce mode. Always do a real-time export for critical sessions if your DAW offers the option.
The exported file has a click or pop at the beginning or end. Set your export range to start at least one bar before your mix begins and end at least two to three seconds after the last sound decays.
The file is louder or quieter than expected. Check that your master fader is at unity gain (0 dB) before export. A master fader that has been pulled down to manage headroom will produce an unexpectedly quiet export.
Stereo image collapses on mono playback. This indicates a phase cancellation problem in your mix. Check your mix in mono before exporting. If elements disappear or sound thin, you have phase issues that need to be resolved at the mix stage.
Communicating with Your Mastering Engineer
Clear communication is what separates a great mastering experience from a frustrating one. Your mastering engineer is not a mind reader, and the more context you provide, the better the result.
A good project brief includes:
- The intended release format: streaming only, CD, vinyl, or all three. Vinyl mastering has specific requirements around frequency balance, stereo width, and sibilance that differ from digital delivery.
- The target platform: different streaming platforms apply different loudness normalization.
- Your sonic references: the three to five tracks you identified earlier, with notes on specific qualities you want to match.
- Any concerns about the mix: if you know the low end is a little heavy or the vocal sits slightly forward, say so.
- Revision expectations: understand what the process includes before you begin.
As documented in Music producers' guide to working with mastering engineers, the most successful mastering sessions are those where the artist has done the preparation work and arrives with a clear brief and well-organized files.
A stereo mix is standard for most projects. Stems are appropriate when you want the mastering engineer to have additional control over the balance between elements, or when the project is complex enough to benefit from that flexibility.
Preparing your files correctly is the foundation of a great master, but it is only half the equation. The other half is working with an engineer who has the experience, the monitoring environment, and the analog outboard gear to bring out everything your music is capable of. LB-Mastering Studios, led by a Latin GRAMMY Award-winning and 11x Billboard-charting engineer with over 44 years of professional experience, offers CD, stem, and vinyl mastering through a specialized analog facility built for exactly this work. A free sample master is available so you can hear the difference before committing. Book a session and hear what your music sounds like at its full potential.
Frequently Asked Questions
Q: What file format should I use for mastering?
A: Send a 24-bit WAV or AIFF file at the sample rate your session was recorded in — typically 44.1 kHz or 48 kHz. These uncompressed formats preserve full dynamic range and frequency detail. Avoid MP3 or AAC files, which introduce compression artifacts that a mastering engineer cannot reverse. If your DAW supports 32-bit float rendering, that format is also acceptable, as it captures the widest dynamic range before dithering is applied.
Q: How much headroom should I leave for mastering?
A: Aim for your stereo mix to peak between -3 dBFS and -6 dBFS, with an average loudness around -18 to -23 LUFS. This headroom for mastering gives the engineer room to apply gain staging, analog processing, and limiting without hitting a ceiling. A mix that already peaks at 0 dBFS leaves no room to work and often contains clipping or inter-sample peaks that damage the final master's transient response and dynamic range.
Q: Should I remove my limiter before sending a mix for mastering?
A: Yes. Remove or bypass any limiter, heavy bus compression, or loudness-maximizing plugin on your master fader before exporting. These processors reduce dynamic range and can cause distortion that a mastering engineer cannot undo. The mastering process applies its own carefully calibrated limiting and compression using professional outboard gear or precision plugins, so sending a mix with dynamics intact produces a noticeably better final master.
Q: Should I include a reference track with my mix?
A: Including reference tracks for mastering is strongly recommended. Choose one or two commercially released songs in a similar genre that represent the tonal balance, loudness, and stereo image you want. Your mastering engineer uses these to calibrate their monitoring environment and understand your creative intent. Be specific about what you like — the low-end weight, the brightness of the highs, or the overall LUFS level — rather than just naming the track.