
 how-to
How to Check LUFS Levels in Your DAW: 2026 Guide
Table of Contents
- What You'll Need Before You Start Measuring
- How to Check LUFS Levels in Your DAW: Step-by-Step
- Integrated vs Short-Term LUFS: Which Reading Do You Trust?
- Target LUFS for Streaming: YouTube, Spotify, and Apple Music
- Best Free LUFS Meter Plugins for Any DAW
- Offline Analysis vs Real-Time Monitoring: Two Workflows That Catch Different Problems
- Common Mistakes When Checking LUFS Levels
- Frequently Asked Questions
Last Updated: September 14, 2026
What You'll Need Before You Start Measuring
Checking loudness in your DAW requires three things: a metering plugin inserted on your master bus, a finished mix or master to analyze, and a clear target level for your distribution platform. Without all three, you're measuring in the dark.
The core concept is straightforward. LUFS, or Loudness Units Full Scale, is a measurement of perceived loudness that approximates how human hearing responds to audio. (Recommendation ITU-T H.872 (10/2024)) Unlike peak meters that catch transient spikes, LUFS readings reflect the sustained energy your listeners actually perceive.
Before you open your session, confirm these essentials:
- A LUFS metering plugin (most DAWs include one, or free options exist)
- Your master bus routed correctly with the meter at the end of the signal chain
- A reference track at your target loudness for comparison
- Knowledge of where your music will be distributed
ITU-R BS.1770 loudness measurement standard defines the algorithm behind LUFS calculations, and understanding this helps you interpret readings accurately.
At LB-Mastering Studios, we've seen countless mixes arrive with excellent tonal balance but wildly inconsistent loudness. The measurement step catches what your ears miss after hours of listening.
How to Check LUFS Levels in Your DAW: Step-by-Step
The process takes about 15 minutes once your session is set up. Follow these steps to get accurate readings.
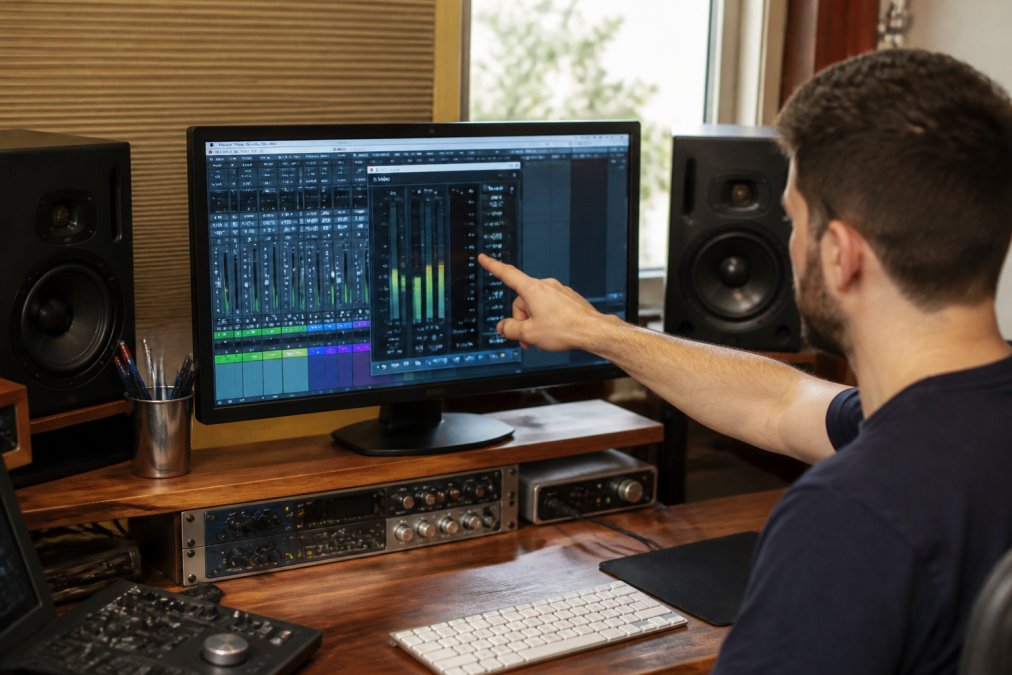
Step 1: Set Up Your Metering Plugin on the Master Bus
Insert your LUFS meter as the final plugin on your master bus, after any processing. This placement ensures you're reading the actual output, not an intermediate signal.
Most DAWs include stock metering options. Logic Pro has Loudness Meter, Ableton Live includes a meter in the Utility plugin, and Pro Tools offers the free Pro Limiter with metering. If your DAW lacks built-in options, free third-party plugins work identically.
Configure the meter to display Integrated, Short-term, and True Peak simultaneously. This gives you the full picture in one view.
Step 2: Play Through the Full Track and Read Integrated Loudness
Press play from the beginning and let the entire track run without stopping. Integrated loudness averages the full program, so partial playback gives misleading numbers.
Watch the Integrated reading settle as the track progresses. For a typical song, the number stabilizes within the first minute and shifts slightly as the arrangement changes.
Step 3: Compare True Peak and Adjust Clip Gain or Limiter Settings
True Peak measures inter-sample peaks that occur during digital-to-analog conversion. If your True Peak exceeds -1 dBTP, streaming platforms may apply additional limiting that degrades your audio.
Address high True Peak readings with clip gain adjustments before your limiter. Lowering clip gain on individual tracks preserves dynamics better than pushing the limiter harder.
Expected Result: Your Integrated reading should match your target platform's specification, and True Peak should stay below -1 dBTP.
Integrated vs Short-Term LUFS: Which Reading Do You Trust?
Both readings serve different purposes, and professional engineers monitor both during a session.
Integrated LUFS measures average loudness across your entire program. This is the number streaming platforms use for normalization decisions. If Spotify turns your track down, Integrated loudness triggered it.
Short-term LUFS measures loudness over a 3-second window. This reading shows you how loud specific sections feel in real time. A chorus that reads 4 LU louder than your verse will feel jarring to listeners even if the Integrated number looks correct.
The distinction matters because a track can hit the right Integrated target while still having problem areas. Short-term monitoring catches those inconsistencies.
| Reading Type | Window | Best For | Target Use |
|---|---|---|---|
| Integrated | Full program | Platform normalization | Final delivery specs |
| Short-term | 3 seconds | Section balance | Mix consistency |
| Momentary | 400 milliseconds | Transient analysis | Dynamic control |
| True Peak | Instantaneous | Clipping prevention | Codec safety |
Trust Integrated for final delivery decisions. Use Short-term to verify that your quietest and loudest sections sit within a reasonable range of each other.
Target LUFS for Streaming: YouTube, Spotify, and Apple Music
Each major platform normalizes playback to a specific loudness target. Delivering above that target means your track gets turned down, often with additional processing that affects quality. Understanding the mechanism behind normalization helps you make smarter mastering decisions.
| Platform | Target LUFS | True Peak Limit | Normalization Behavior |
|---|---|---|---|
| Spotify | -14 LUFS | -1 dBTP | Loudness normalization on by default; tracks above target receive gain reduction, tracks below may receive gain increase up to +6 dB |
| Apple Music | -16 LUFS | -1 dBTP | Sound Check normalizes to -16 LUFS; uses its own loudness analysis |
| YouTube | -14 LUFS | -1 dBTP | Normalizes to -14 LUFS; quieter tracks may be turned up |
| Amazon Music | -14 LUFS | -2 dBTP | Normalizes to -14 LUFS; stricter True Peak ceiling |
| Tidal | -14 LUFS | -1 dBTP | Normalizes to -14 LUFS |
A common mistake is mastering to the loudest platform target and assuming quieter platforms will simply turn you down without consequence. In practice, aggressive normalization can introduce artifacts, especially on dynamic material. When a platform applies gain reduction, it may also engage a limiter to prevent clipping, which can flatten transients and reduce perceived punch.
Spotify's loudness normalization documentation confirms that tracks exceeding -14 LUFS receive gain reduction, while quieter tracks may receive gain increases up to a limit. This means a track mastered at -8 LUFS will be turned down 6 dB on Spotify, but a track at -16 LUFS will be turned up 2 dB. The quieter master often retains more dynamic range after normalization because it hasn't been crushed to hit a louder target.
Mastering for streaming requires balancing competitive loudness against dynamic range preservation. A track at -14 LUFS with healthy dynamics will sound better after normalization than one crushed to -8 LUFS that gets turned down 6 dB. The goal is to deliver a master that sits at or slightly below the platform target, preserving transients and avoiding unnecessary limiting.
For multi-platform distribution, target the quietest specification you'll encounter. If you're releasing on Apple Music (-16 LUFS) and Spotify (-14 LUFS), mastering to -16 LUFS ensures your track won't be turned down on either platform. Louder platforms will simply normalize upward, which is a cleaner process than downward gain reduction.
Keep in mind that platform targets are guidelines, not hard rules. Some genres benefit from slightly louder masters, while classical and jazz recordings often sit below -16 LUFS. Use your ears alongside your meter, and reference commercial tracks in your genre to calibrate your target.
Best Free LUFS Meter Plugins for Any DAW
Free metering options have improved dramatically. These plugins deliver accurate readings without costing anything.
Youlean Loudness Meter 2 remains the standard free option. It displays Integrated, Short-term, Momentary, and True Peak readings simultaneously, with platform-specific presets that show exactly where your track sits relative to streaming targets.
dpMeter 5 from TBProAudio offers similar functionality with a cleaner interface. The plugin includes EBU R128 and ITU-R BS.1770 compliance, making it suitable for broadcast work as well as music.
SPAN by Voxengo provides spectrum analysis alongside loudness metering. The free version includes LUFS readings, though the display is less prominent than dedicated meters.
For Logic Pro users, the stock Loudness Meter covers all essential readings. Ableton Live users can access LUFS through the Utility plugin's metering section.
Install at least two meters and cross-reference readings on the same track. If the numbers diverge significantly, one plugin has a configuration issue.
Offline Analysis vs Real-Time Monitoring: Two Workflows That Catch Different Problems
Real-time monitoring during playback shows how your track behaves as listeners experience it. Offline analysis processes the entire file faster than real-time and provides a complete loudness report.
Real-time monitoring is what most tutorials show: insert a meter, press play, watch the numbers. This workflow builds intuition because you hear the track while watching the meter. You connect what you hear to what the numbers show. But real-time monitoring has a blind spot: you can't watch the meter every second, and brief spikes or dips may slip past your eyes.
Offline analysis solves that problem. Instead of playing the track in real time, you process the entire file through an analysis algorithm that reports Integrated, Short-term, Momentary, and True Peak values without waiting for playback. A 4-minute track that takes 4 minutes to play in real time can be analyzed in seconds.
Here's how to run offline analysis in common DAWs:
- Pro Tools: Use AudioSuite > Loudness Meter or the free Pro Limiter in AudioSuite mode. Select the region, choose "Analyze," and the plugin processes the file faster than real time. This is the fastest way to check LUFS on a finished mix.
- Logic Pro: Use the Loudness Meter plugin in offline mode by bouncing the track and analyzing the bounced file. Alternatively, use the "Analyze" function in the Audio File Editor.
- Ableton Live: Export the track, then drag the exported file into a new session and use the Utility plugin's metering in conjunction with a third-party offline analyzer like Youlean Loudness Meter 2, which offers an offline analysis mode.
- Reaper: Use the "Render" function with the "Analyze" option enabled, or use the SWS extension's loudness analysis tools.
- FL Studio: Use the "Export" dialog with the "Analyze" option, or insert a loudness meter on the master bus and use the "Render" function to process the file offline.
Offline analysis catches what real-time playback misses. A brief spike that your eyes didn't catch during playback appears clearly in the analysis report. Integrated loudness calculations from offline tools often differ slightly from real-time readings because they process the entire file without interruption, eliminating the risk of dropped samples or buffer underruns.
Use both workflows. Monitor in real time during mixing to maintain consistency. Run offline analysis before delivery to verify specifications. The combination gives you the speed of offline analysis and the intuitive feedback of real-time monitoring.
For a complete quality control workflow, run offline analysis on your final master, then play the track in real time while watching the meter. If the numbers match, you're ready to deliver. If they diverge, investigate the discrepancy before releasing.
Common Mistakes When Checking LUFS Levels
Five errors account for most inaccurate readings.
Measuring before the master bus. If your meter sits before the limiter or other processing, you're reading an intermediate signal. The final output is what platforms receive.
Stopping playback early. Integrated loudness requires the full program. A reading taken after 30 seconds may differ significantly from the final number.
Ignoring True Peak. A track can hit -14 LUFS Integrated while exceeding -1 dBTP True Peak. Codecs will clip that track during encoding.
Trusting a single meter. Different plugins implement the standard differently. Cross-reference with a second meter before finalizing.
Forgetting platform-specific targets. A master optimized for Spotify may not suit Apple Music. If you're distributing everywhere, target the quietest specification and let louder platforms normalize upward.
Getting loudness right is one of the final technical hurdles between a finished mix and a professional release. If the measurement process reveals inconsistencies you can't resolve, or if you'd rather hand off the technical details entirely, LB-Mastering Studios offers professional mastering services. Our Latin GRAMMY Award-winning engineer brings over 44 years of experience and 11x Billboard charting credits to every project, working from a specialized analog facility with premium outboard gear. Whether you need single song mastering, stem mastering, or full album preparation for CD and vinyl, we deliver masters optimized for streaming platforms and physical formats alike. Book a session with LB-Mastering Studios and release your music with confidence.
Frequently Asked Questions
How do I check LUFS levels in my DAW?
Load a loudness meter plugin on your master bus, play the track from start to finish without stopping, then read the integrated LUFS value once playback ends. Integrated LUFS measures the average loudness across the whole track, which is what streaming platforms use for normalization. Free options like the Youlean Loudness Meter or the built-in meters in some DAWs work fine for this. Always check true peak as well, since inter-sample peaks above -1 dBTP can cause distortion on lossy streaming codecs.
What is the target LUFS for streaming platforms?
Spotify normalizes to around -14 LUFS integrated, YouTube to about -14 LUFS, and Apple Music to roughly -16 LUFS. These are the target LUFS for streaming that most mastering engineers aim for. Hitting those numbers keeps your track competitive without triggering a loudness penalty that turns your master down. A track mastered much louder than the platform target will simply be reduced in volume, which can make it sound flatter than a quieter, more dynamic master.
What's the difference between integrated and short-term LUFS?
Integrated LUFS is a single average across the entire program and is the number streaming platforms use for normalization. Short-term LUFS updates every three seconds and shows how loud a specific section is right now, which is useful for spotting a chorus that jumps too far above the verses. Momentary LUFS updates every 400 milliseconds and is better for catching transient spikes. Use integrated for the final delivery decision and short-term for balance checks while you mix.
Do I need a third-party plugin to check LUFS, or will my DAW's meter work?
Many DAWs include a loudness meter, but not all of them report integrated, short-term, and true peak in one view. Ableton Live, for example, does not ship with a full LUFS meter, so most users add a free plugin like Youlean or the TBProAudio mvMeter. Logic Pro, Reaper, and Studio One have usable built-in options. If your DAW's meter only shows peak or RMS, adding a dedicated LUFS plugin takes a few minutes and gives you the exact readings streaming services care about.